Creating your first invoice
From a blank page to a professional GST-compliant PDF in your client's inbox — every field explained.
Pro plan+ · 4 min read · Updated July 2026
1. Open the Invoices page
Everything to do with billing your clients lives in one place. The summary cards at the top show your total revenue, what is still outstanding, and how many invoices have been paid.
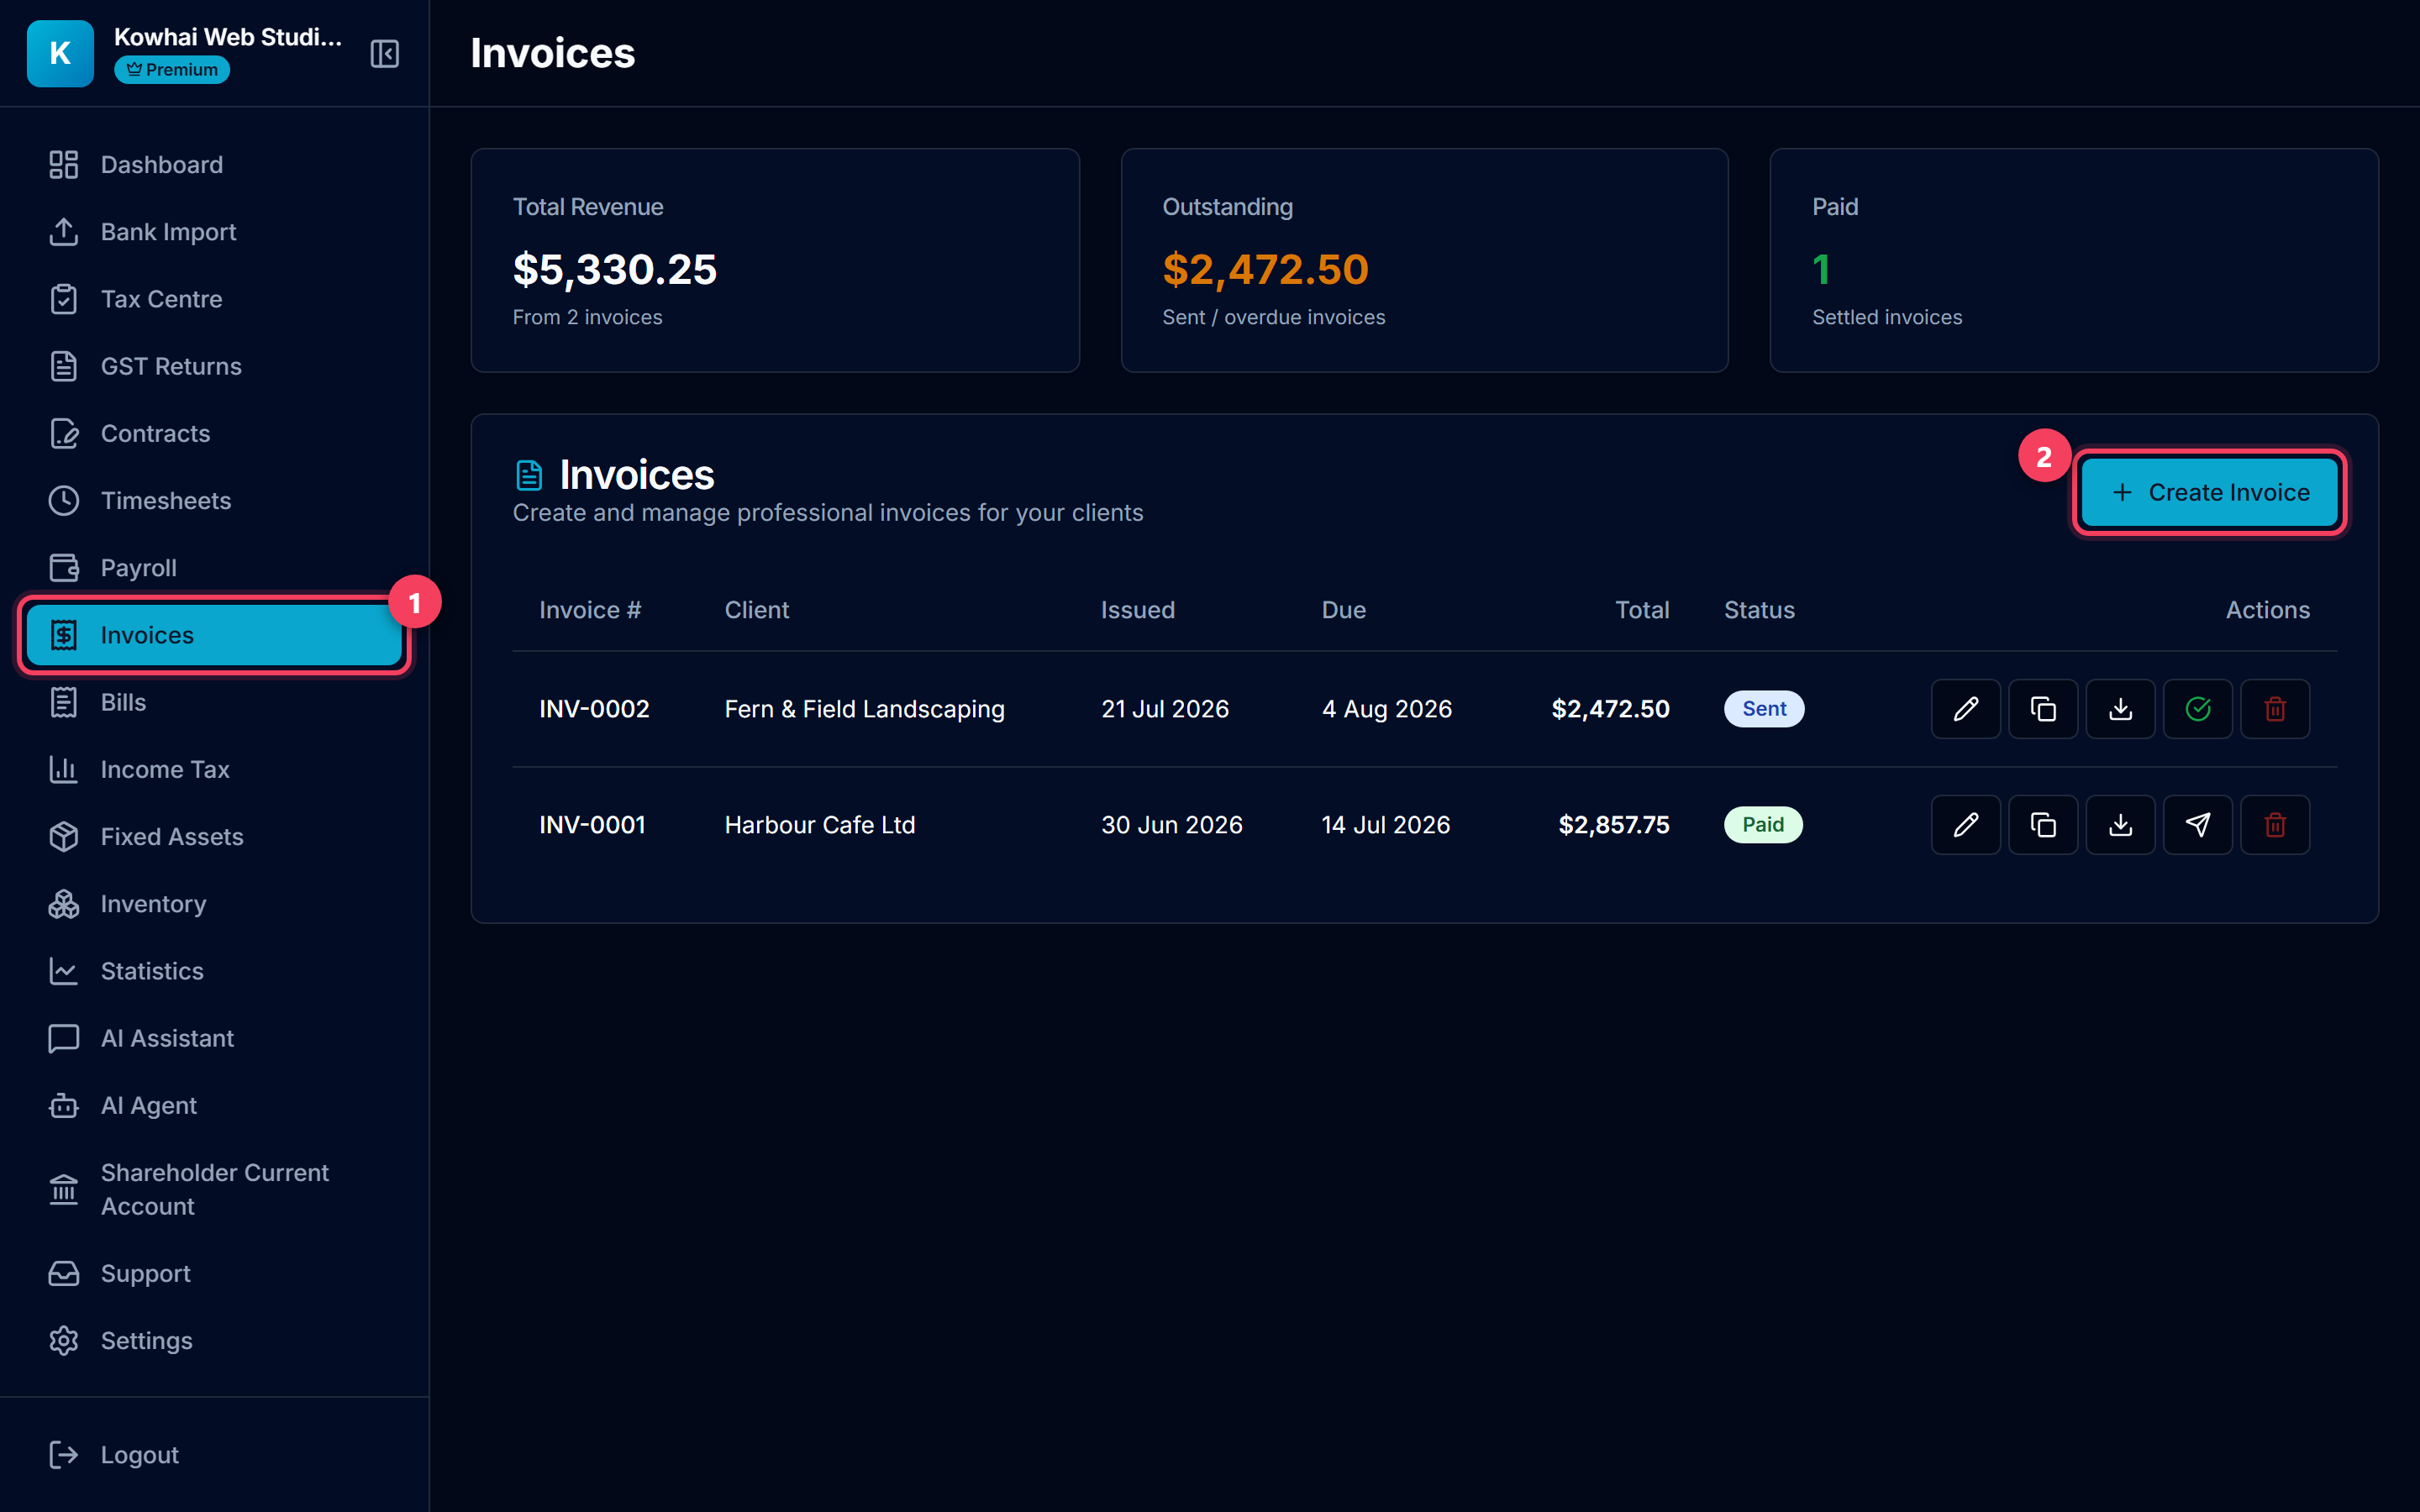
- Click Invoices in the left sidebar.
- Click Create Invoice — the invoice form opens right on this page.
2. Fill in the client details
Only the client name is required — but the more you fill in, the more complete the PDF looks.
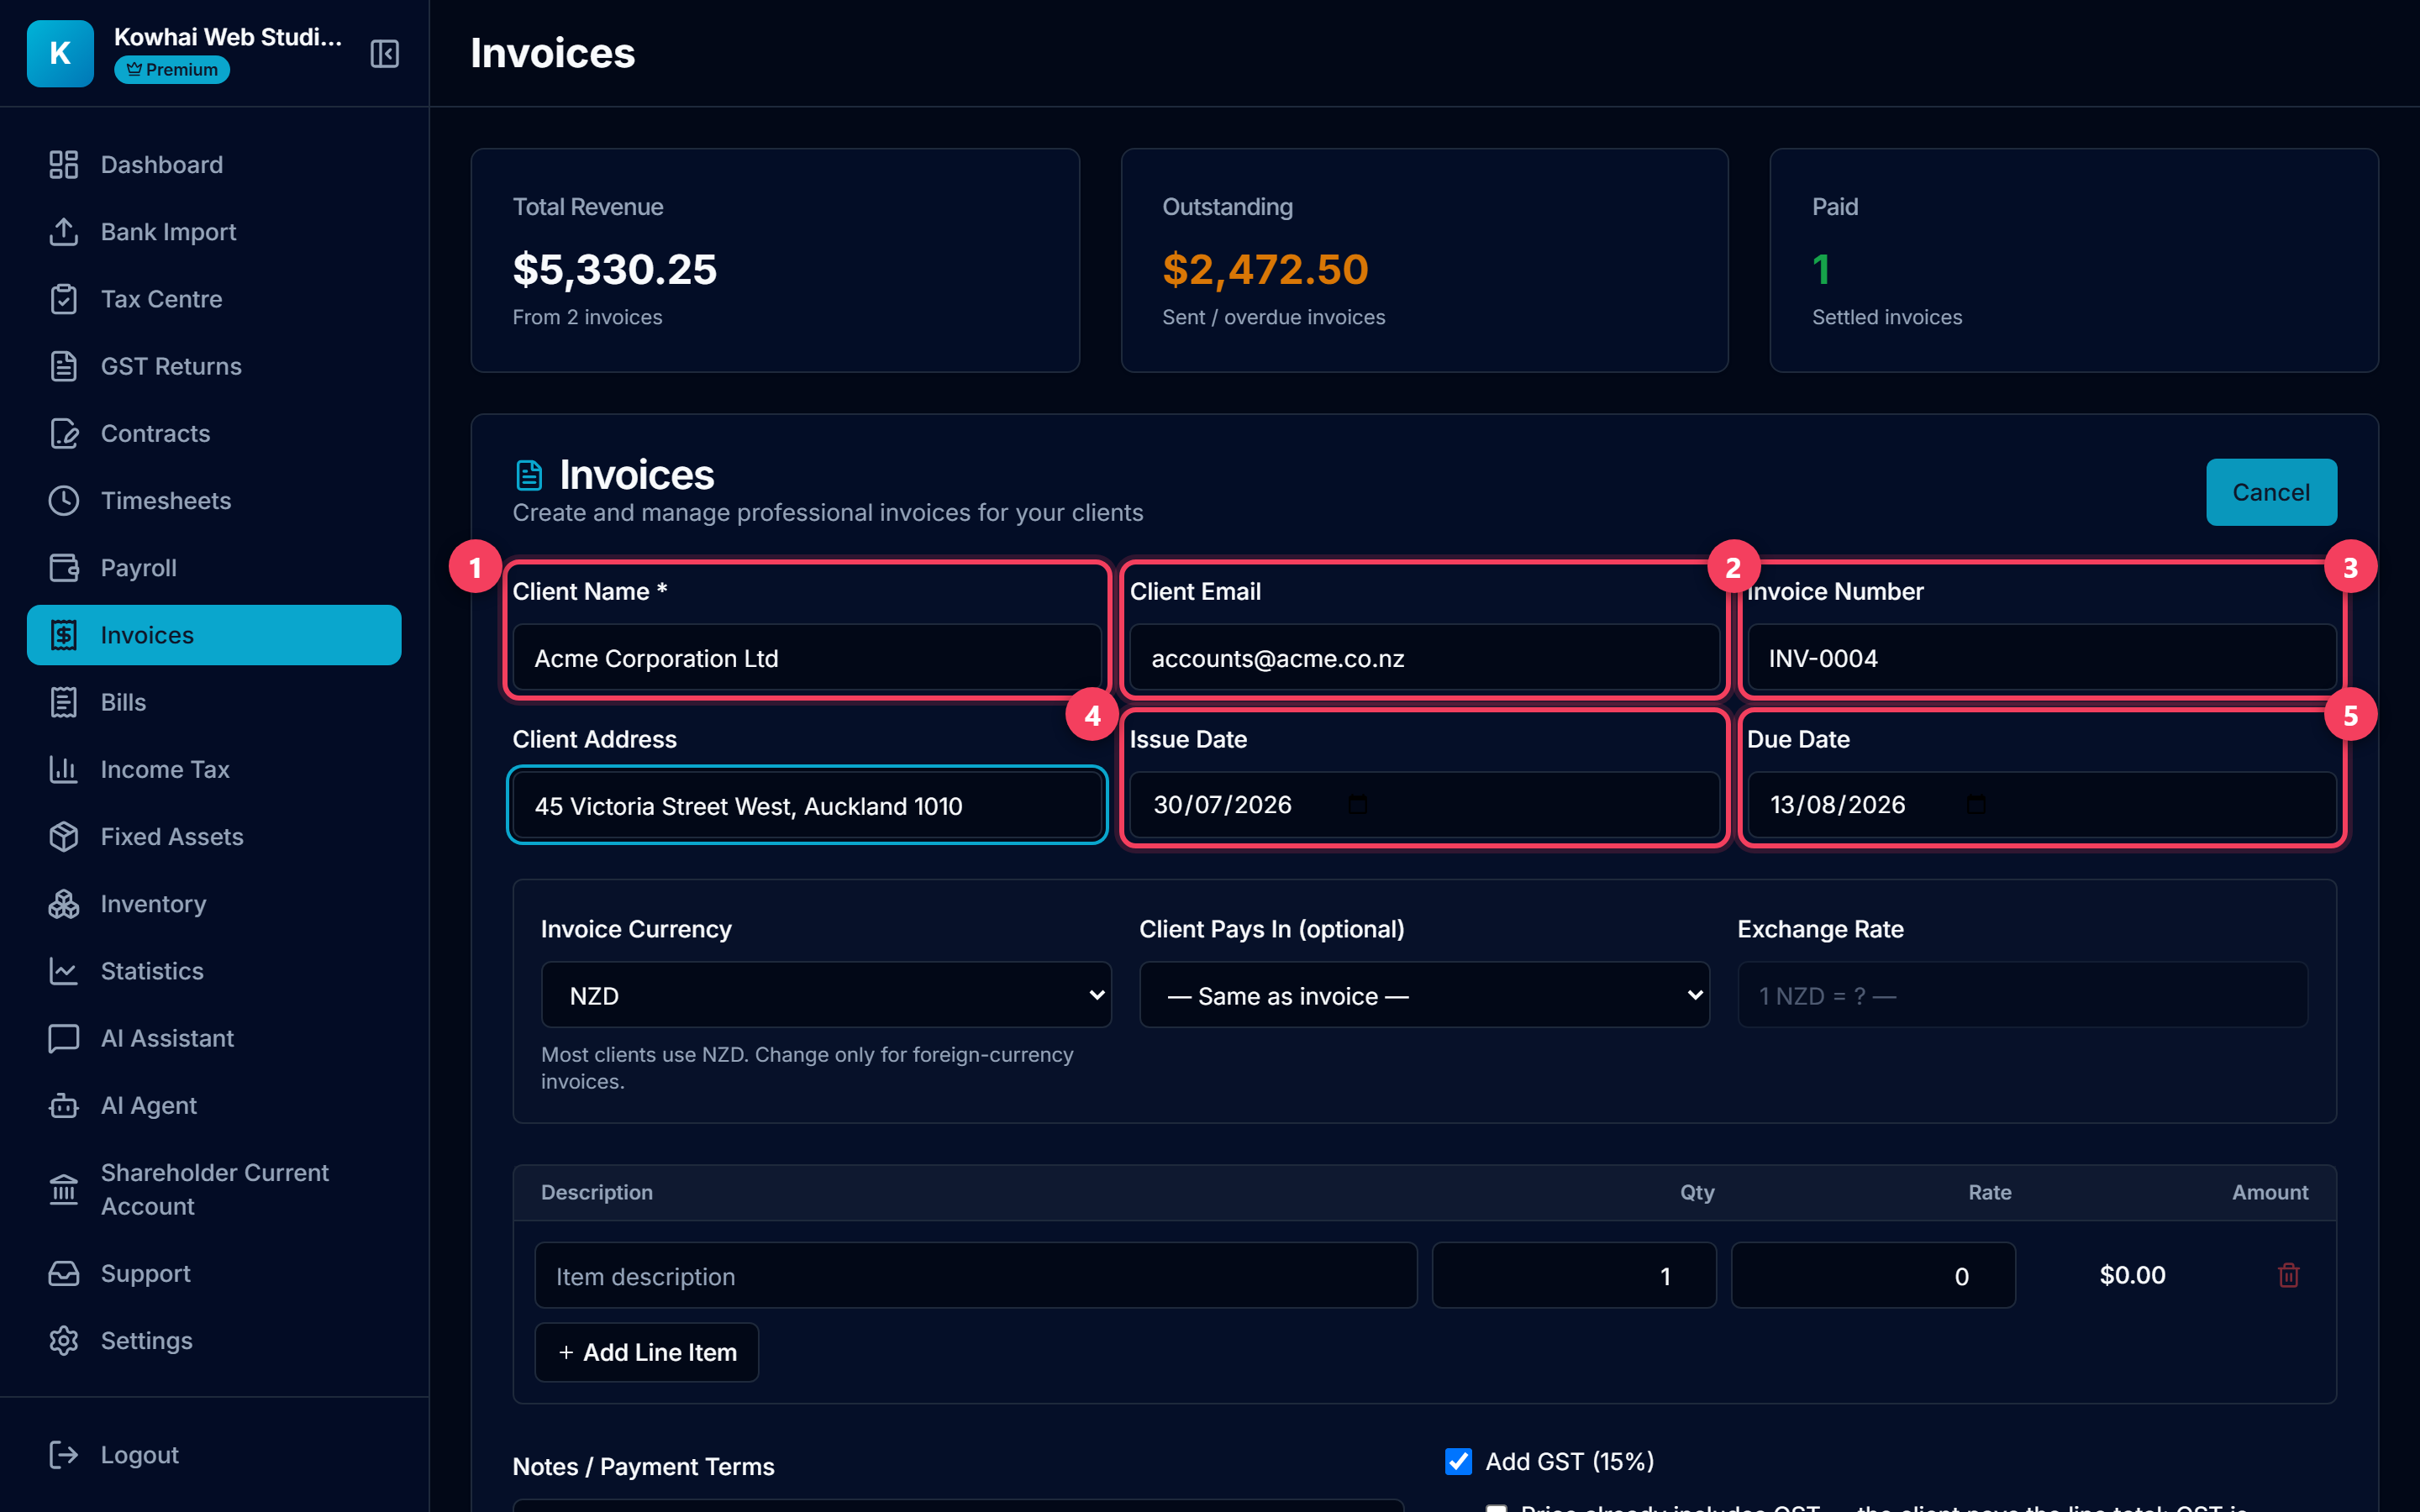
- Client Name (required) — the business or person you are billing.
- Client Email — shown on the invoice so replies go to the right inbox.
- Invoice Number — generated automatically from your prefix. You can type over it, and you can change the prefix under Settings → Company Information.
- Issue Date — defaults to today.
- Due Date — defaults to 14 days later. Adjust to your payment terms.
Tip: Your own company name, logo, address and bank account shown on the finished PDF come from Settings → Company Information — set them up once and every invoice uses them.
3. Add your line items
One line per product or service. Amounts calculate as you type.
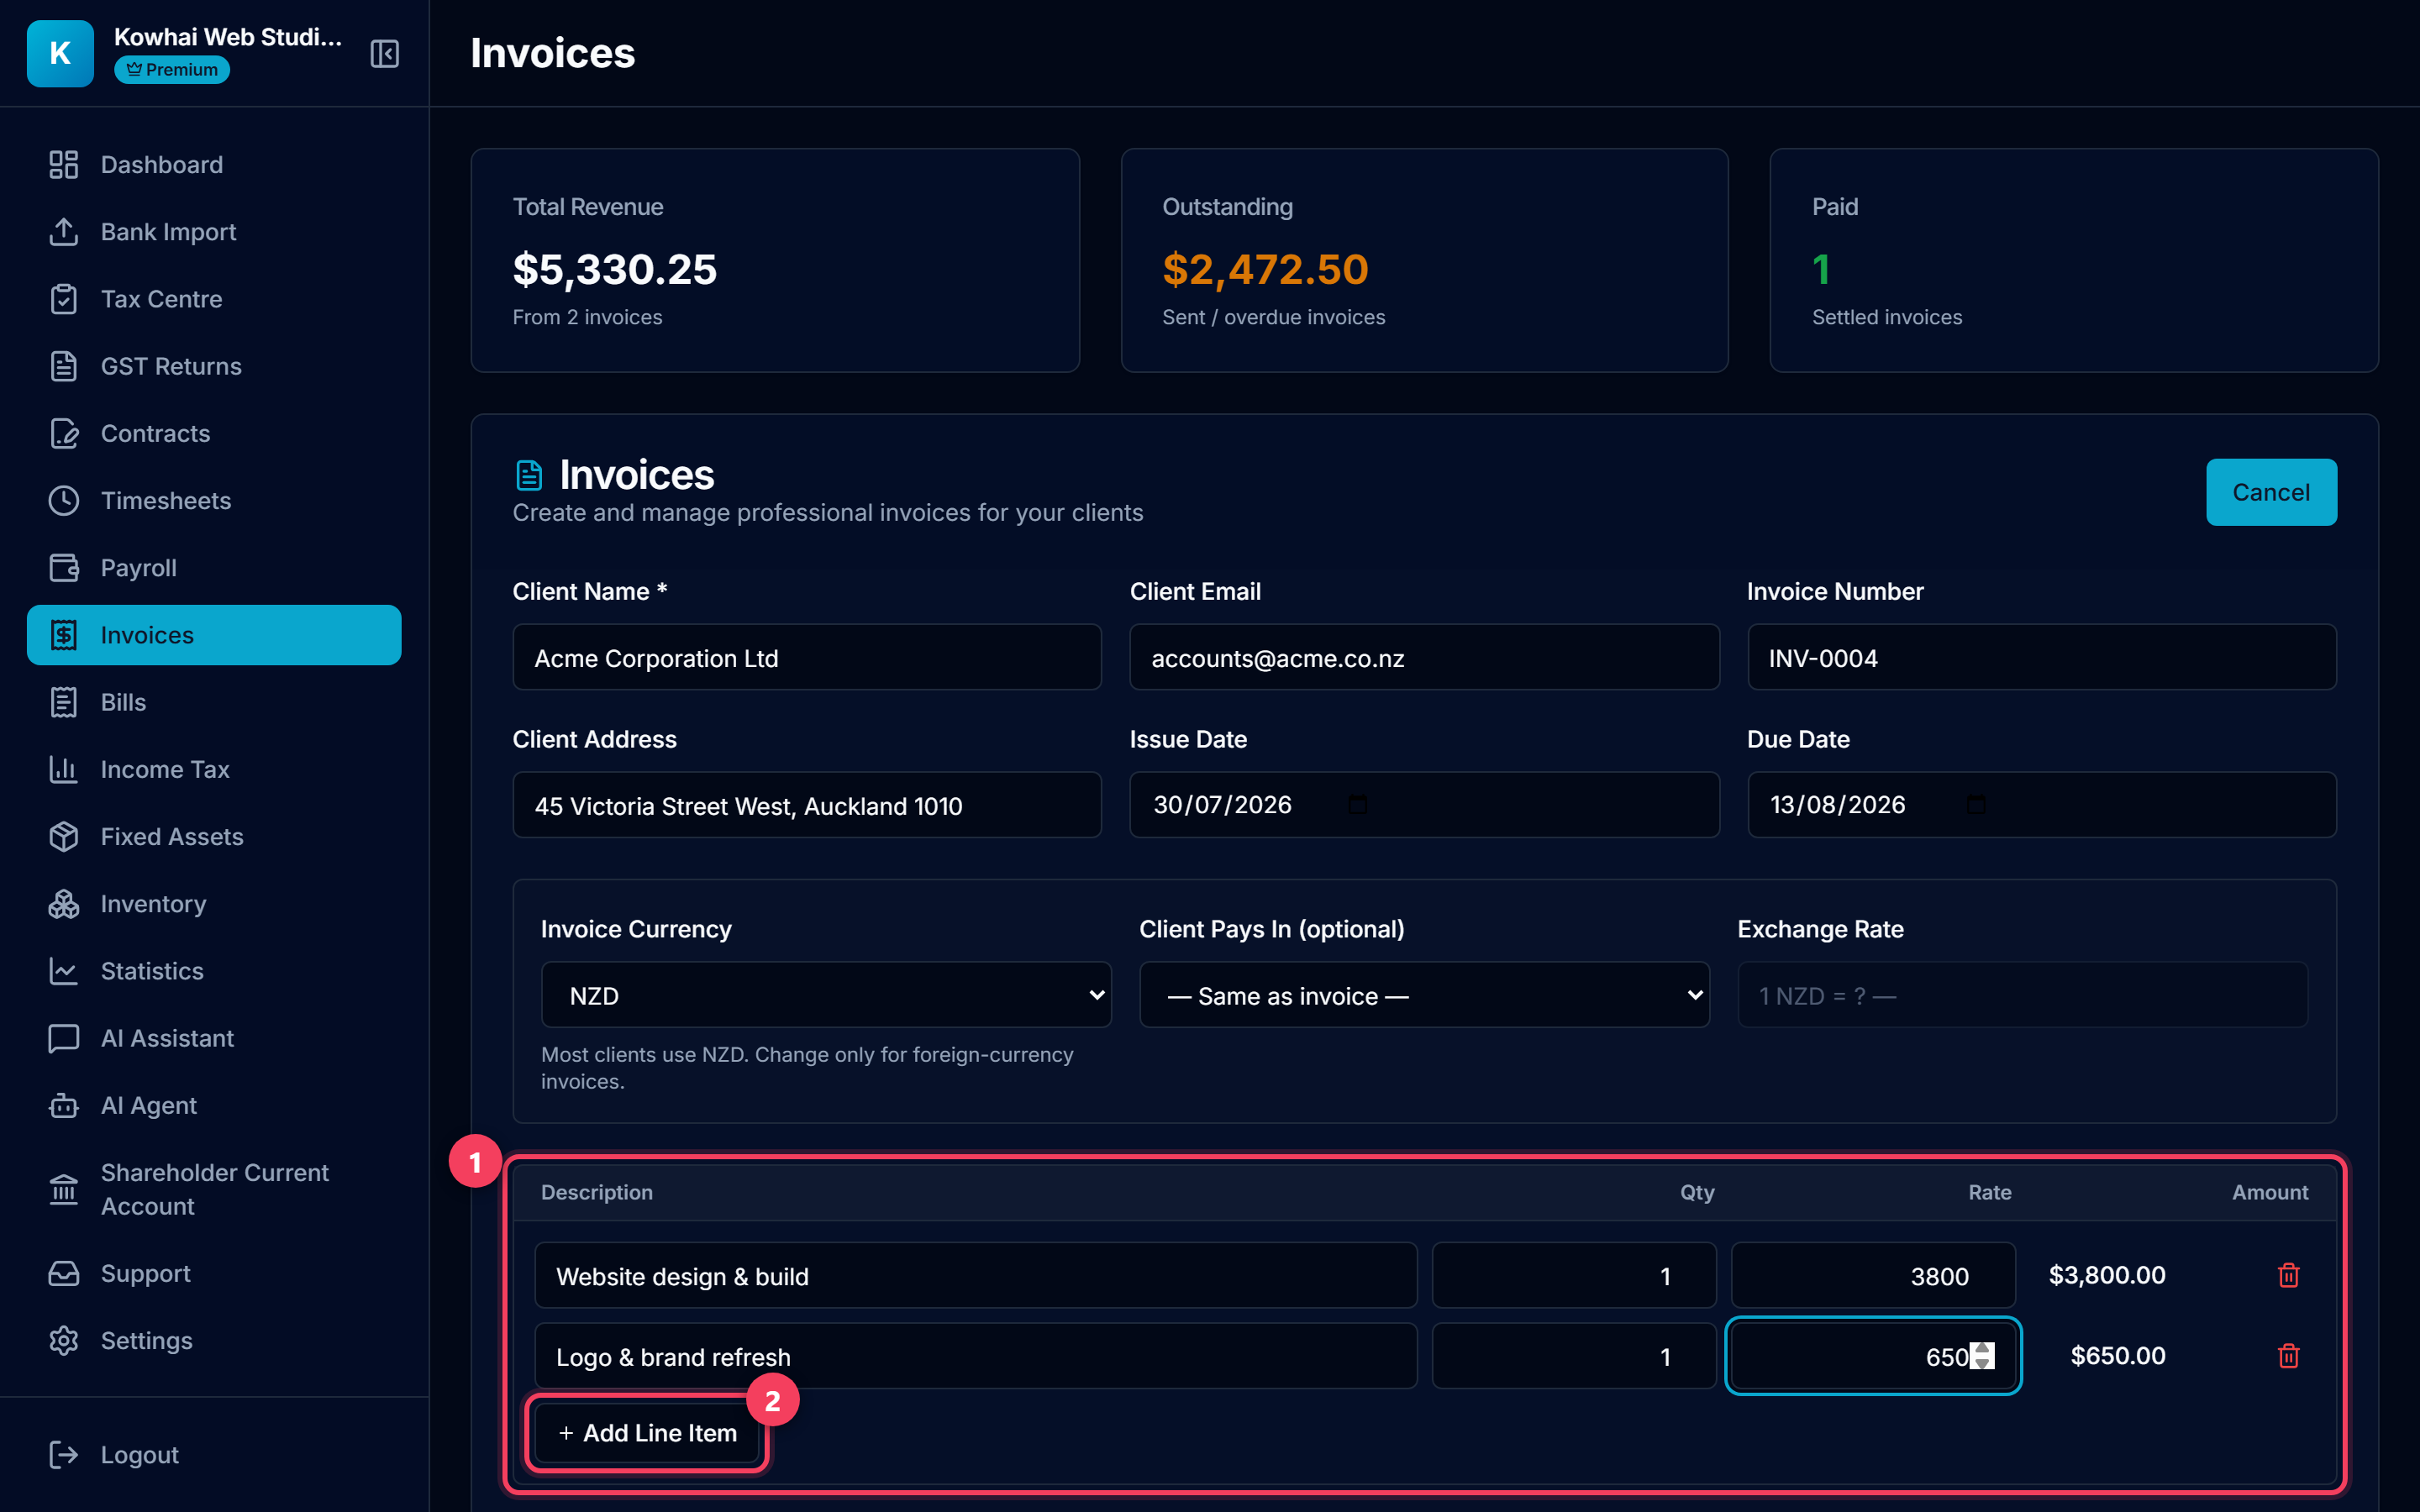
- Enter a Description, Qty and Rate for each item — the Amount column updates automatically.
- Need more rows? Click + Add Line Item. The red bin removes a row.
4. Check GST and the total
LedgerMind handles New Zealand GST for you — you just confirm how the price was agreed.
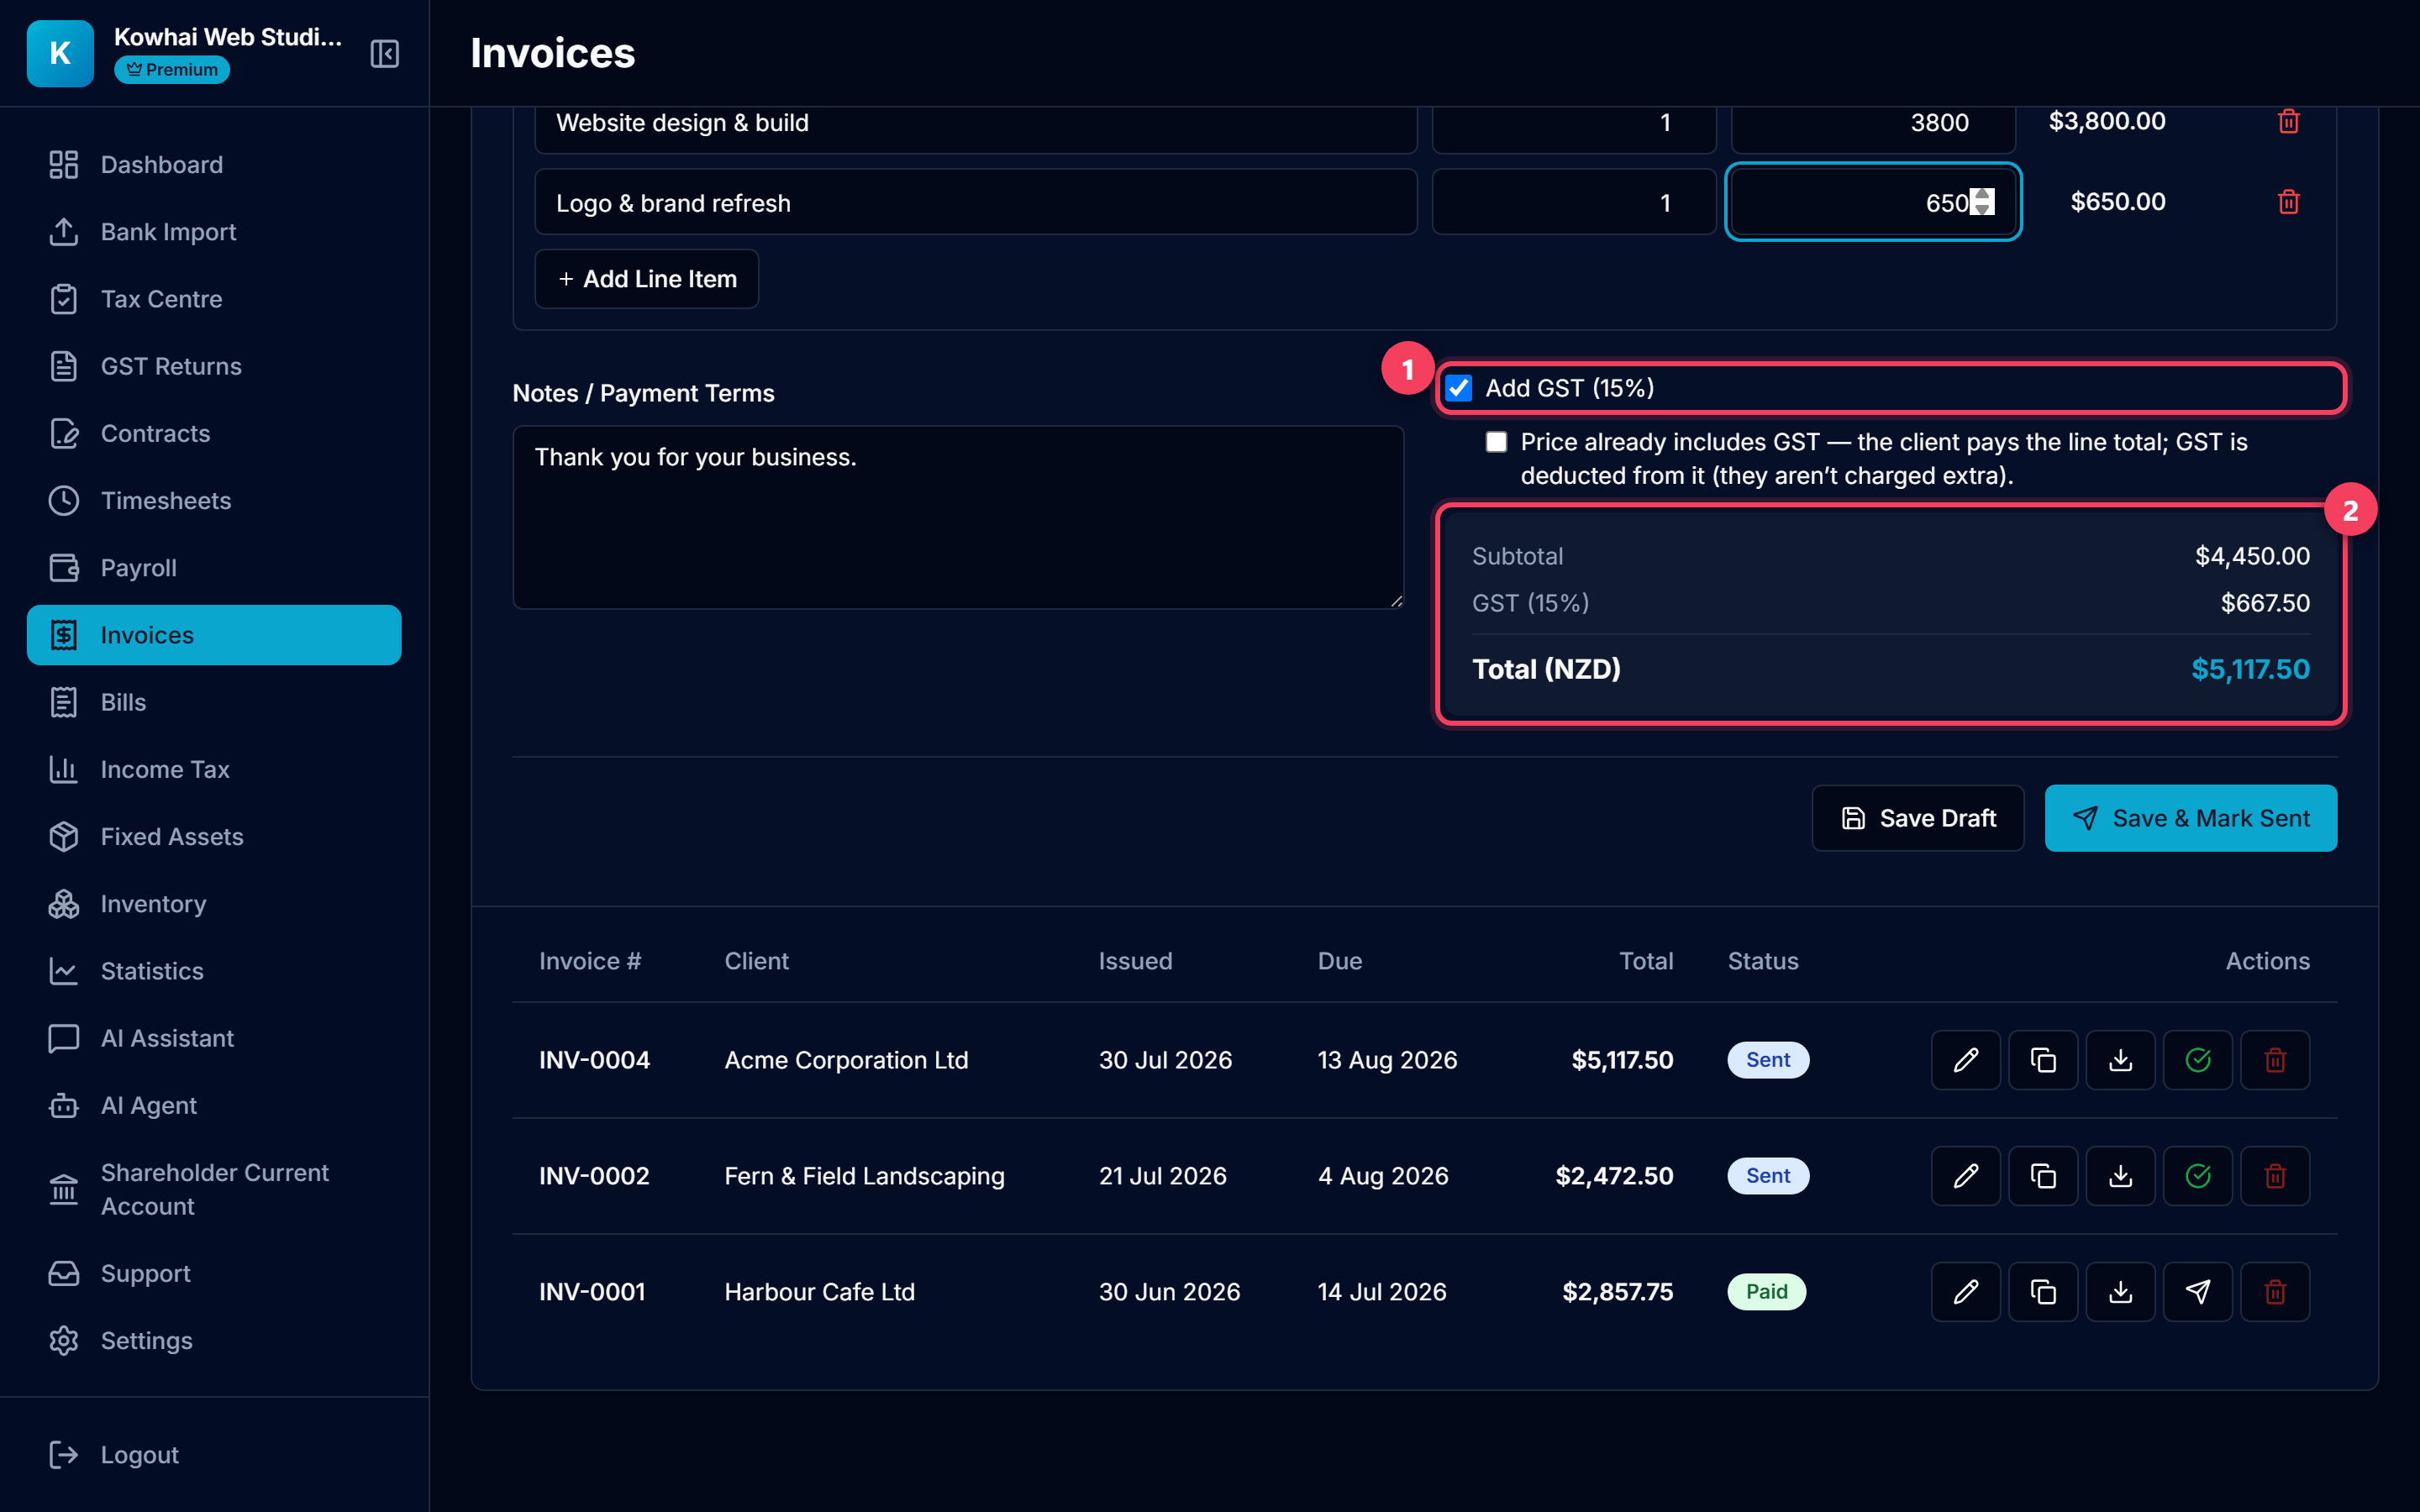
- Add GST (15%) is ticked automatically when your business is GST registered. If the price you agreed already includes GST, also tick "Price already includes GST" — the client pays the line total and GST is extracted from it.
- Review the live Subtotal, GST and Total before saving.
Tip: Not GST registered? Untick "Add GST (15%)" and the invoice is issued without GST.
5. Save the invoice
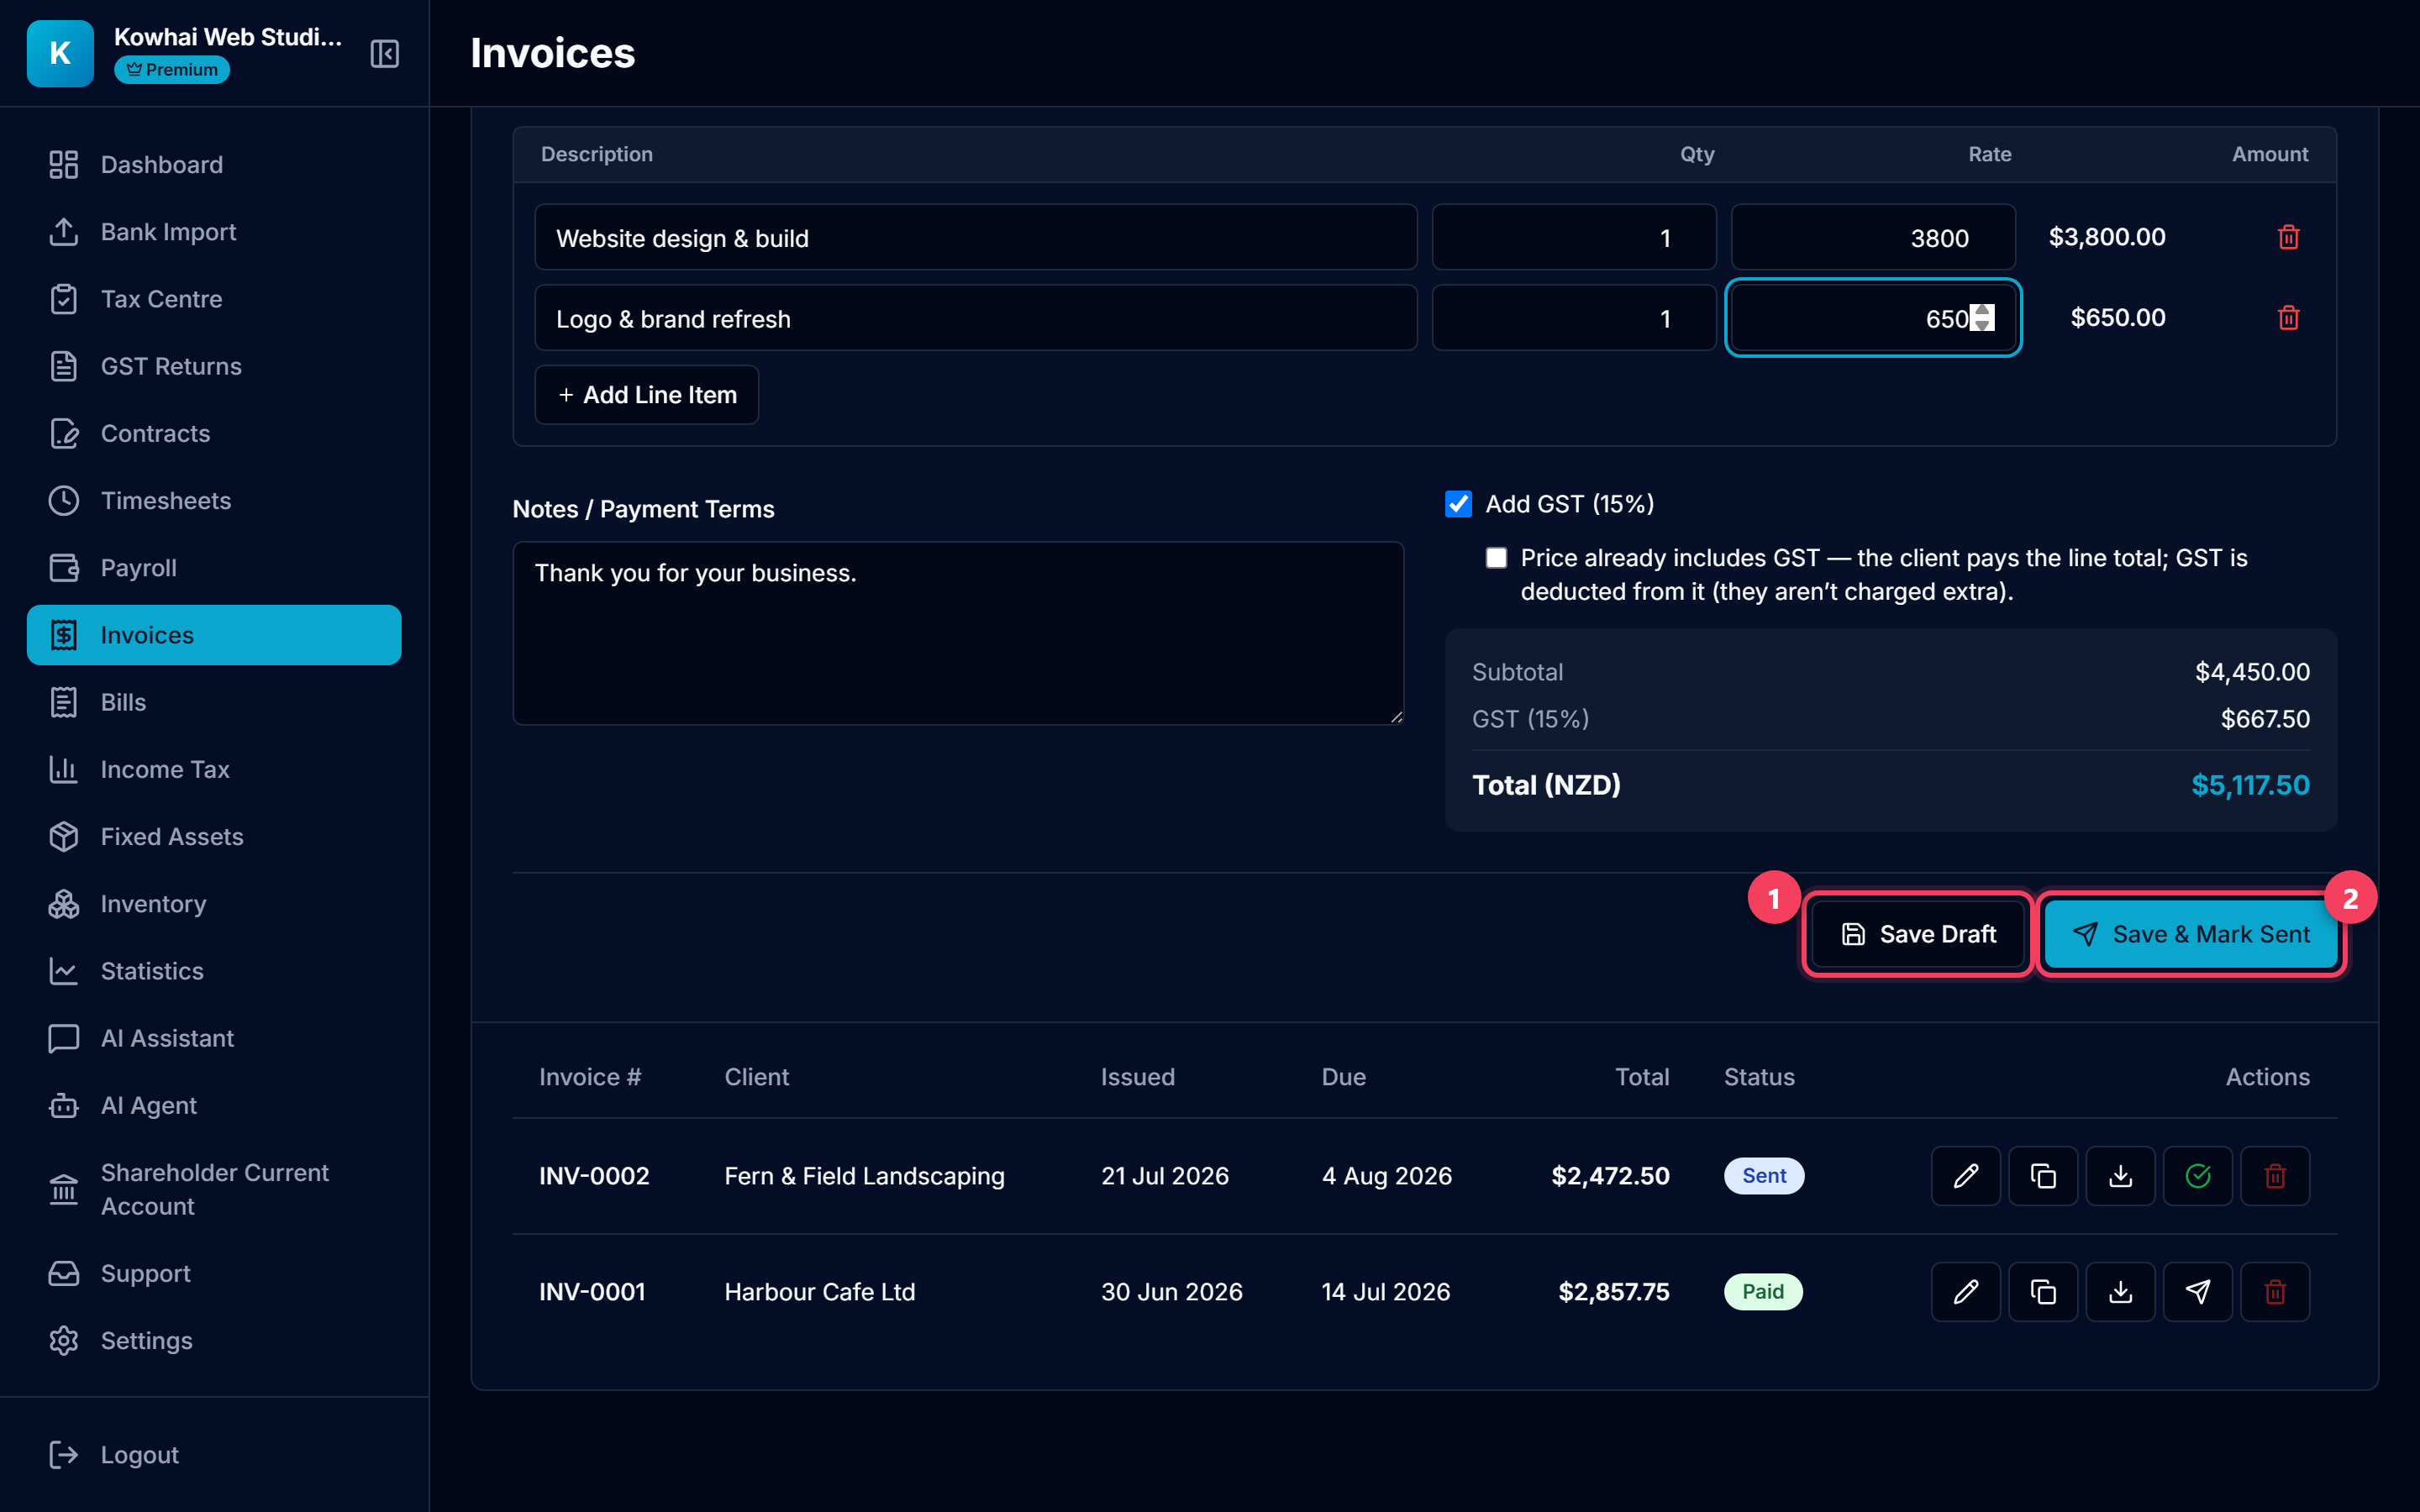
- Save Draft — keeps the invoice as a draft you can finish later. Drafts don't count as outstanding revenue.
- Save & Mark Sent — saves it as Sent, so it immediately shows in your Outstanding total.
6. Download the PDF and get paid
Your new invoice appears at the top of the list, ready to send.
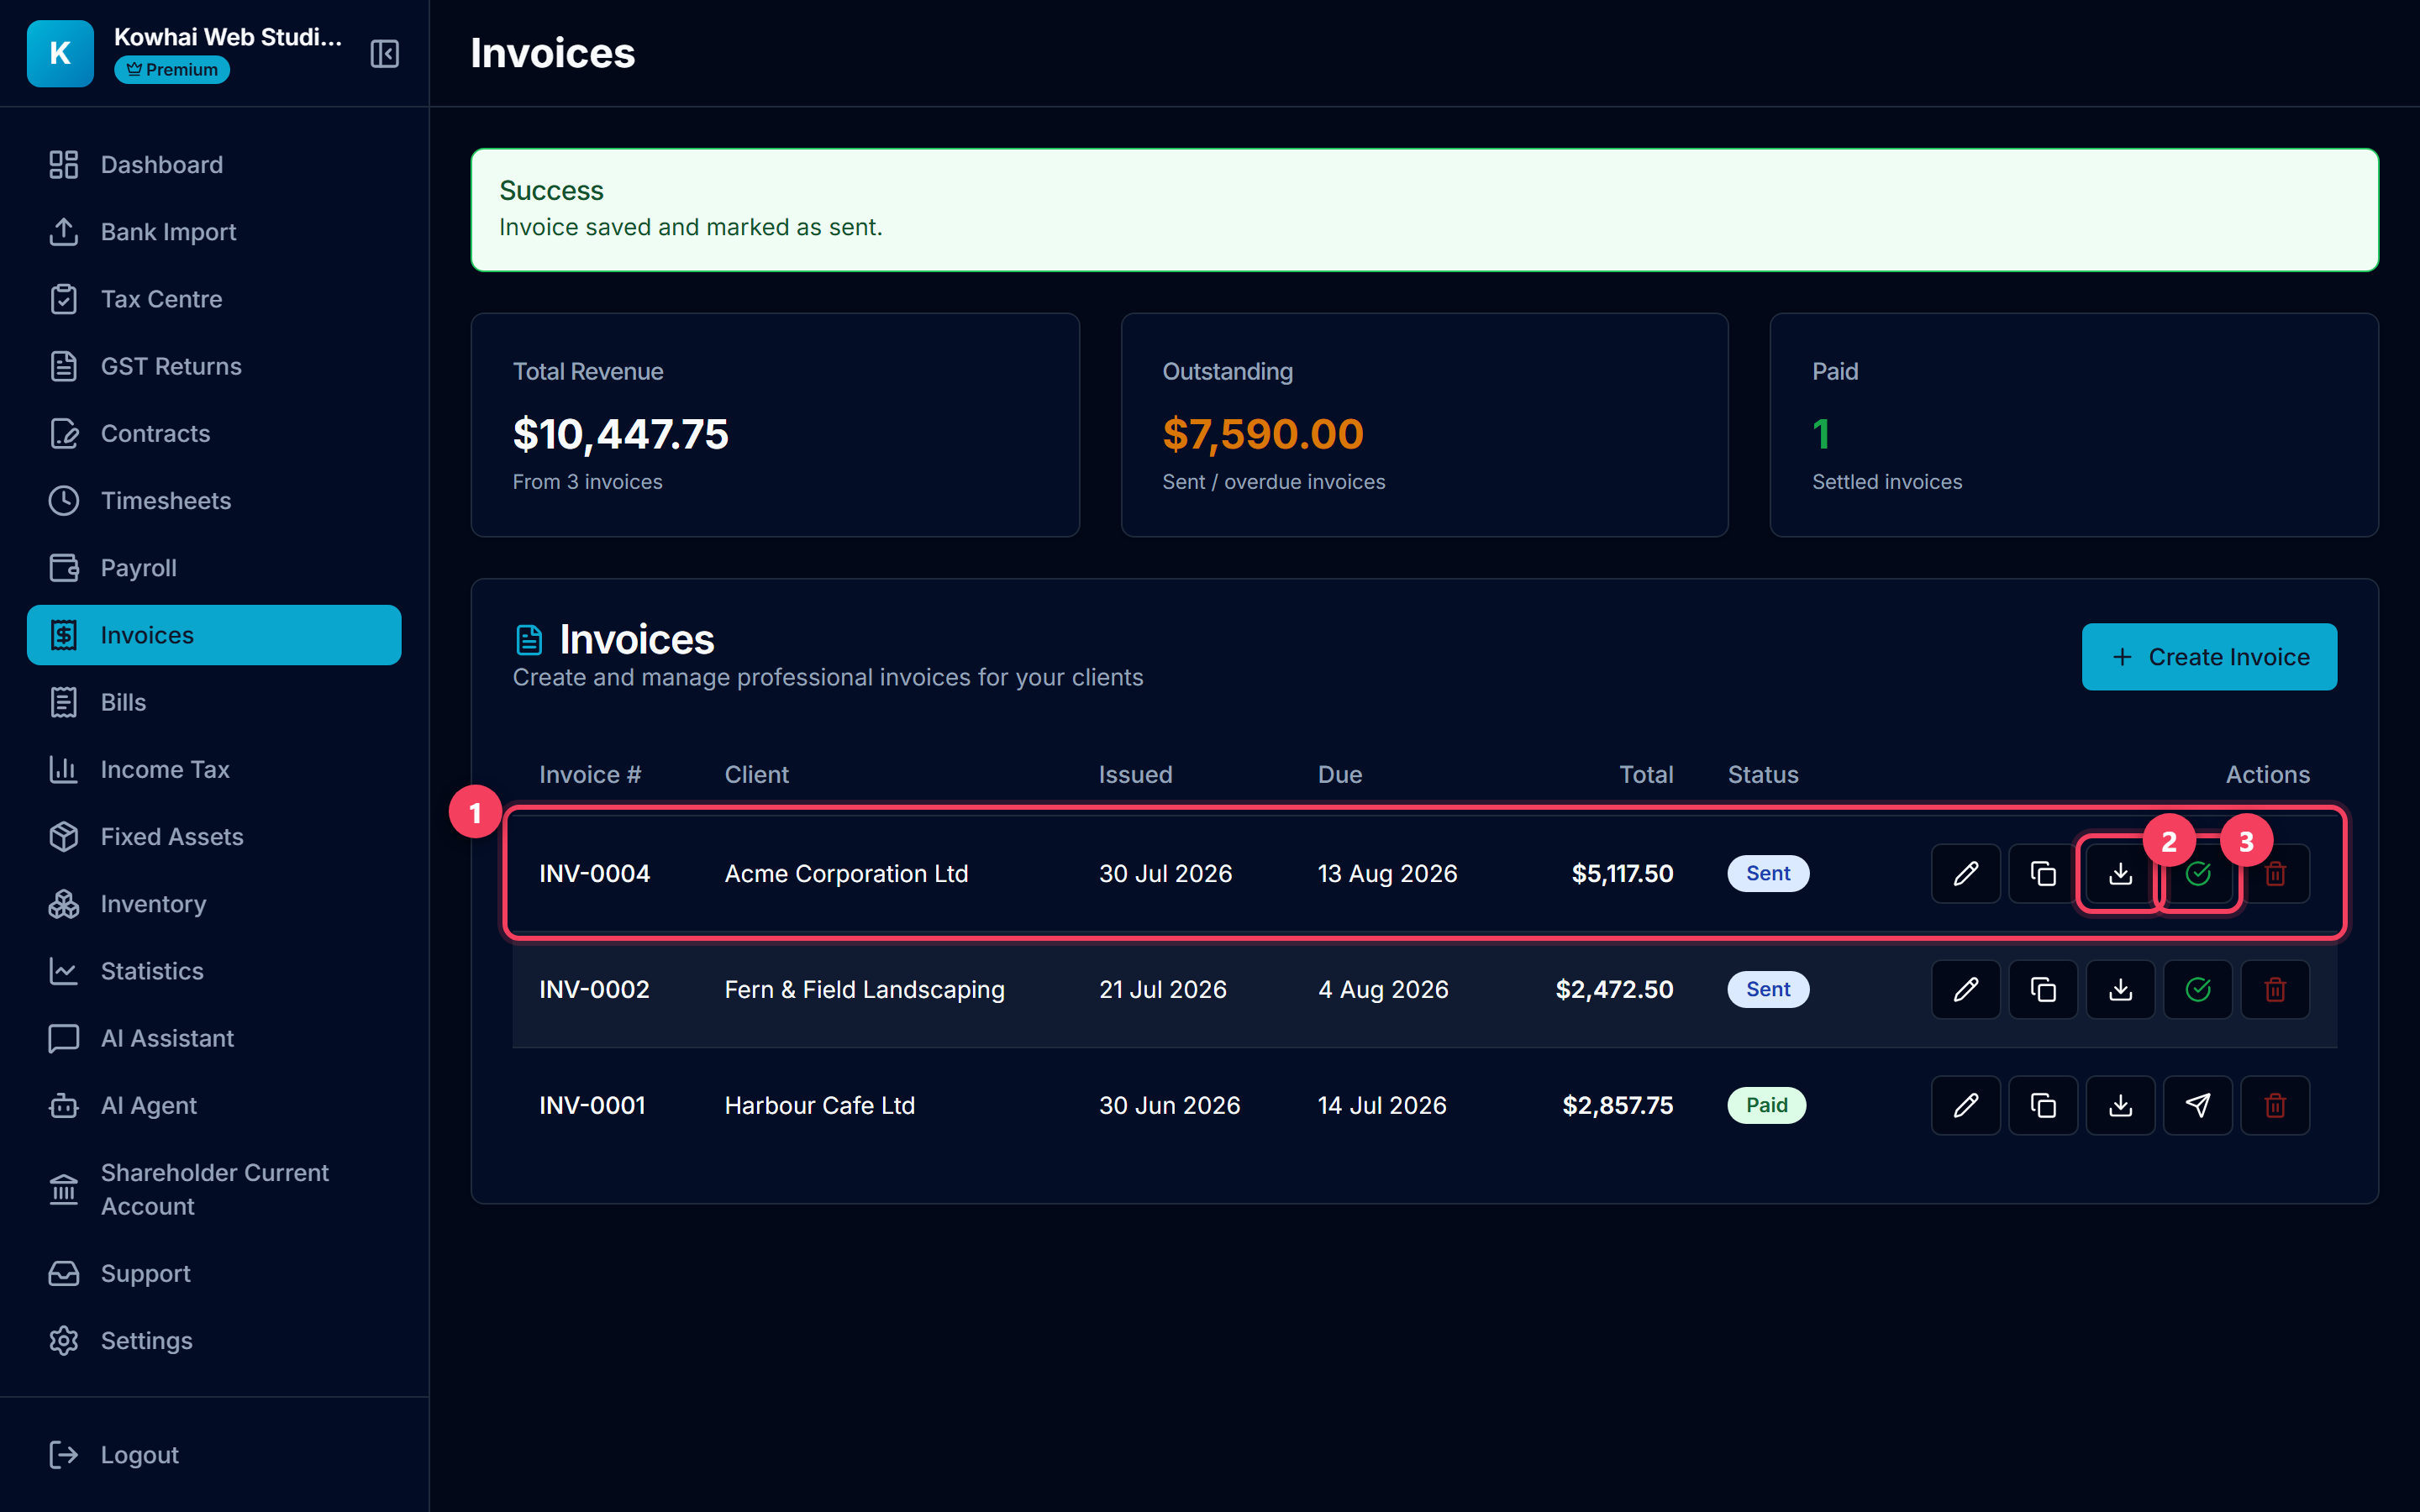
- The new invoice sits at the top of the list with its status badge.
- Download PDF — a professional PDF with your logo, GST number and bank account, ready to email to your client.
- When the money arrives, click the green tick to mark it Paid — your Outstanding and Paid summaries update instantly.
Tip: Made a mistake? Use the pencil icon to edit, or the copy icon to duplicate a similar invoice next month.
Common questions
How do I change the invoice number prefix, my logo or bank details?
Go to Settings → Company Information. The prefix, next number, logo, GST number and bank account shown on the PDF are all set there.
Can I invoice in a foreign currency?
Yes. Pick the Invoice Currency in the form. If your client pays in a different currency, set "Client Pays In" plus the exchange rate and the invoice shows the converted amount too.
What is the difference between Draft and Sent?
A draft is a work in progress — it is excluded from your Outstanding total. Sent means the invoice is with your client and is counted as outstanding until you mark it Paid.