Your first GST return in ten minutes
You have an account and an empty dashboard. Import a bank statement, categorise it, and watch your GST101A figures work themselves out — seven steps, one screenshot each.
Everyone · 8 min read · Updated August 2026
1. Find your way around
The left sidebar is the whole product. Four items matter on day one; the rest can wait until you need them.
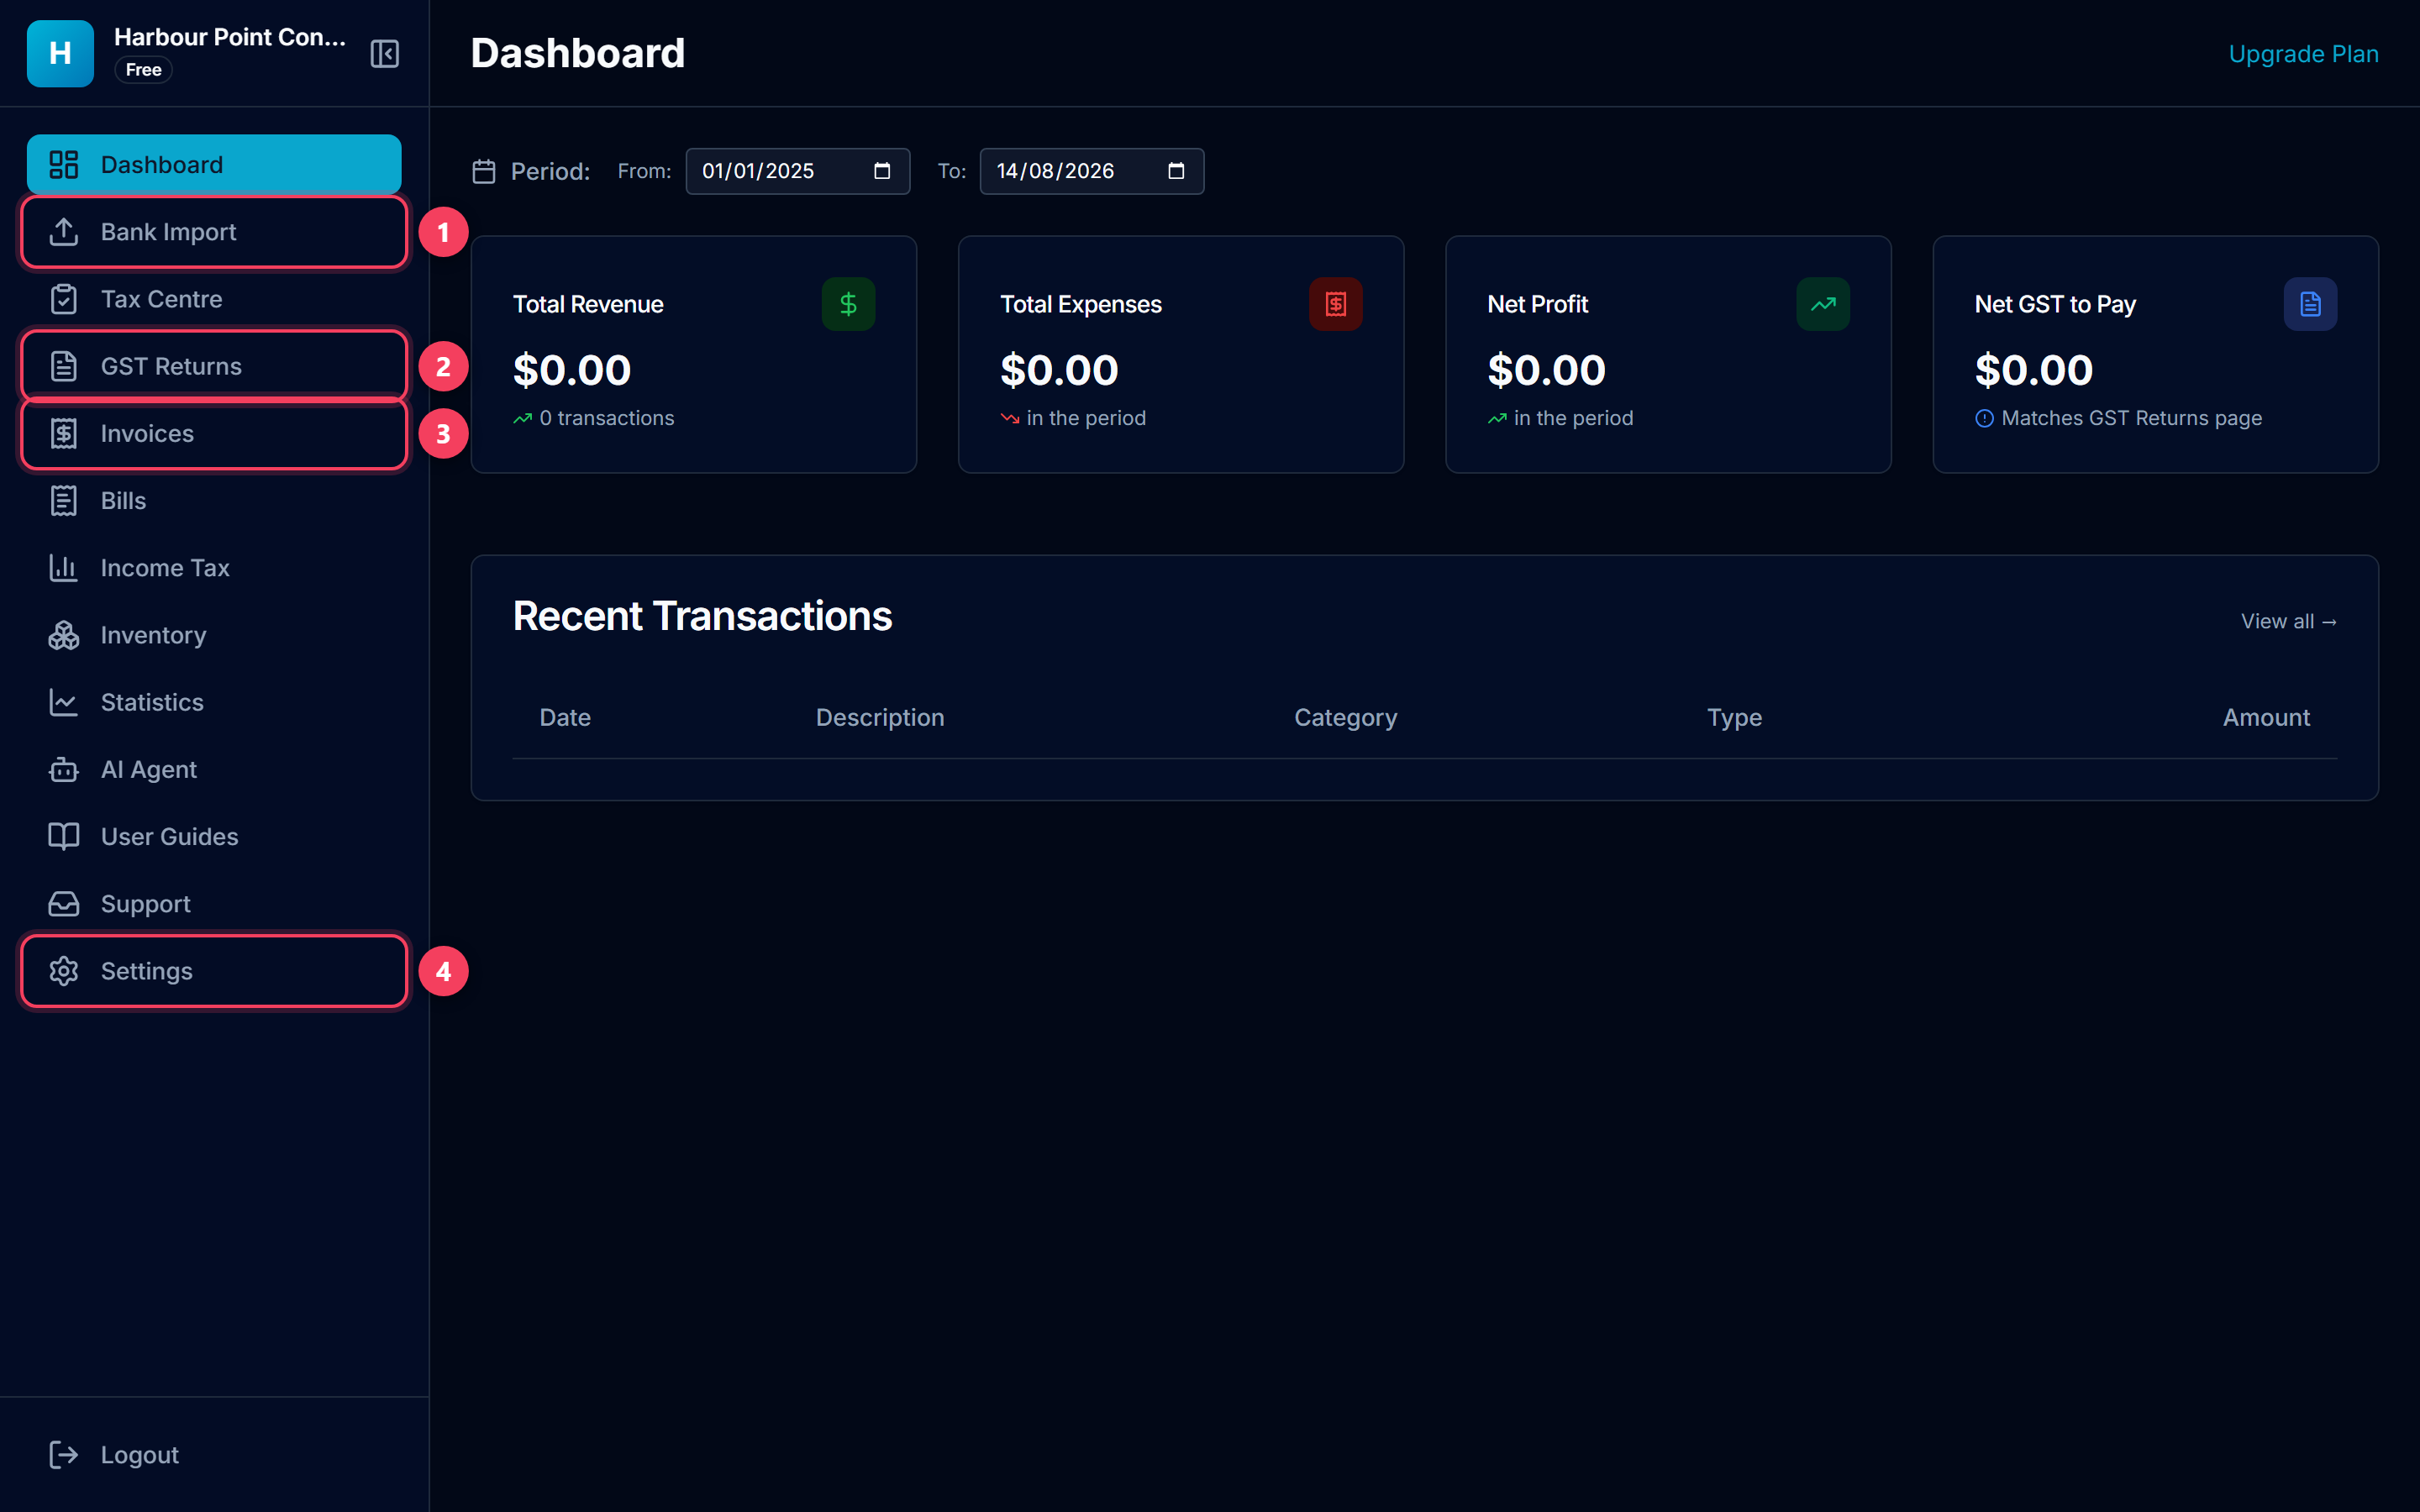
- Bank Import — where money comes in. Start here.
- GST Returns — your GST101A figures, calculated from whatever is in Bank Import.
- Invoices — bills you send out, with your business name already on them.
- Settings — IRD number, GST number, bank account, logo. Fill these in before you send an invoice or file anything.
Tip: The sidebar adapts to your account — GST Returns only appears because you answered "registered".
2. Import a bank statement
Export a CSV or Excel file from your online banking and drop it in. LedgerMind recognises the export formats of the major New Zealand banks and works out which one it is looking at, rather than making you tell it.
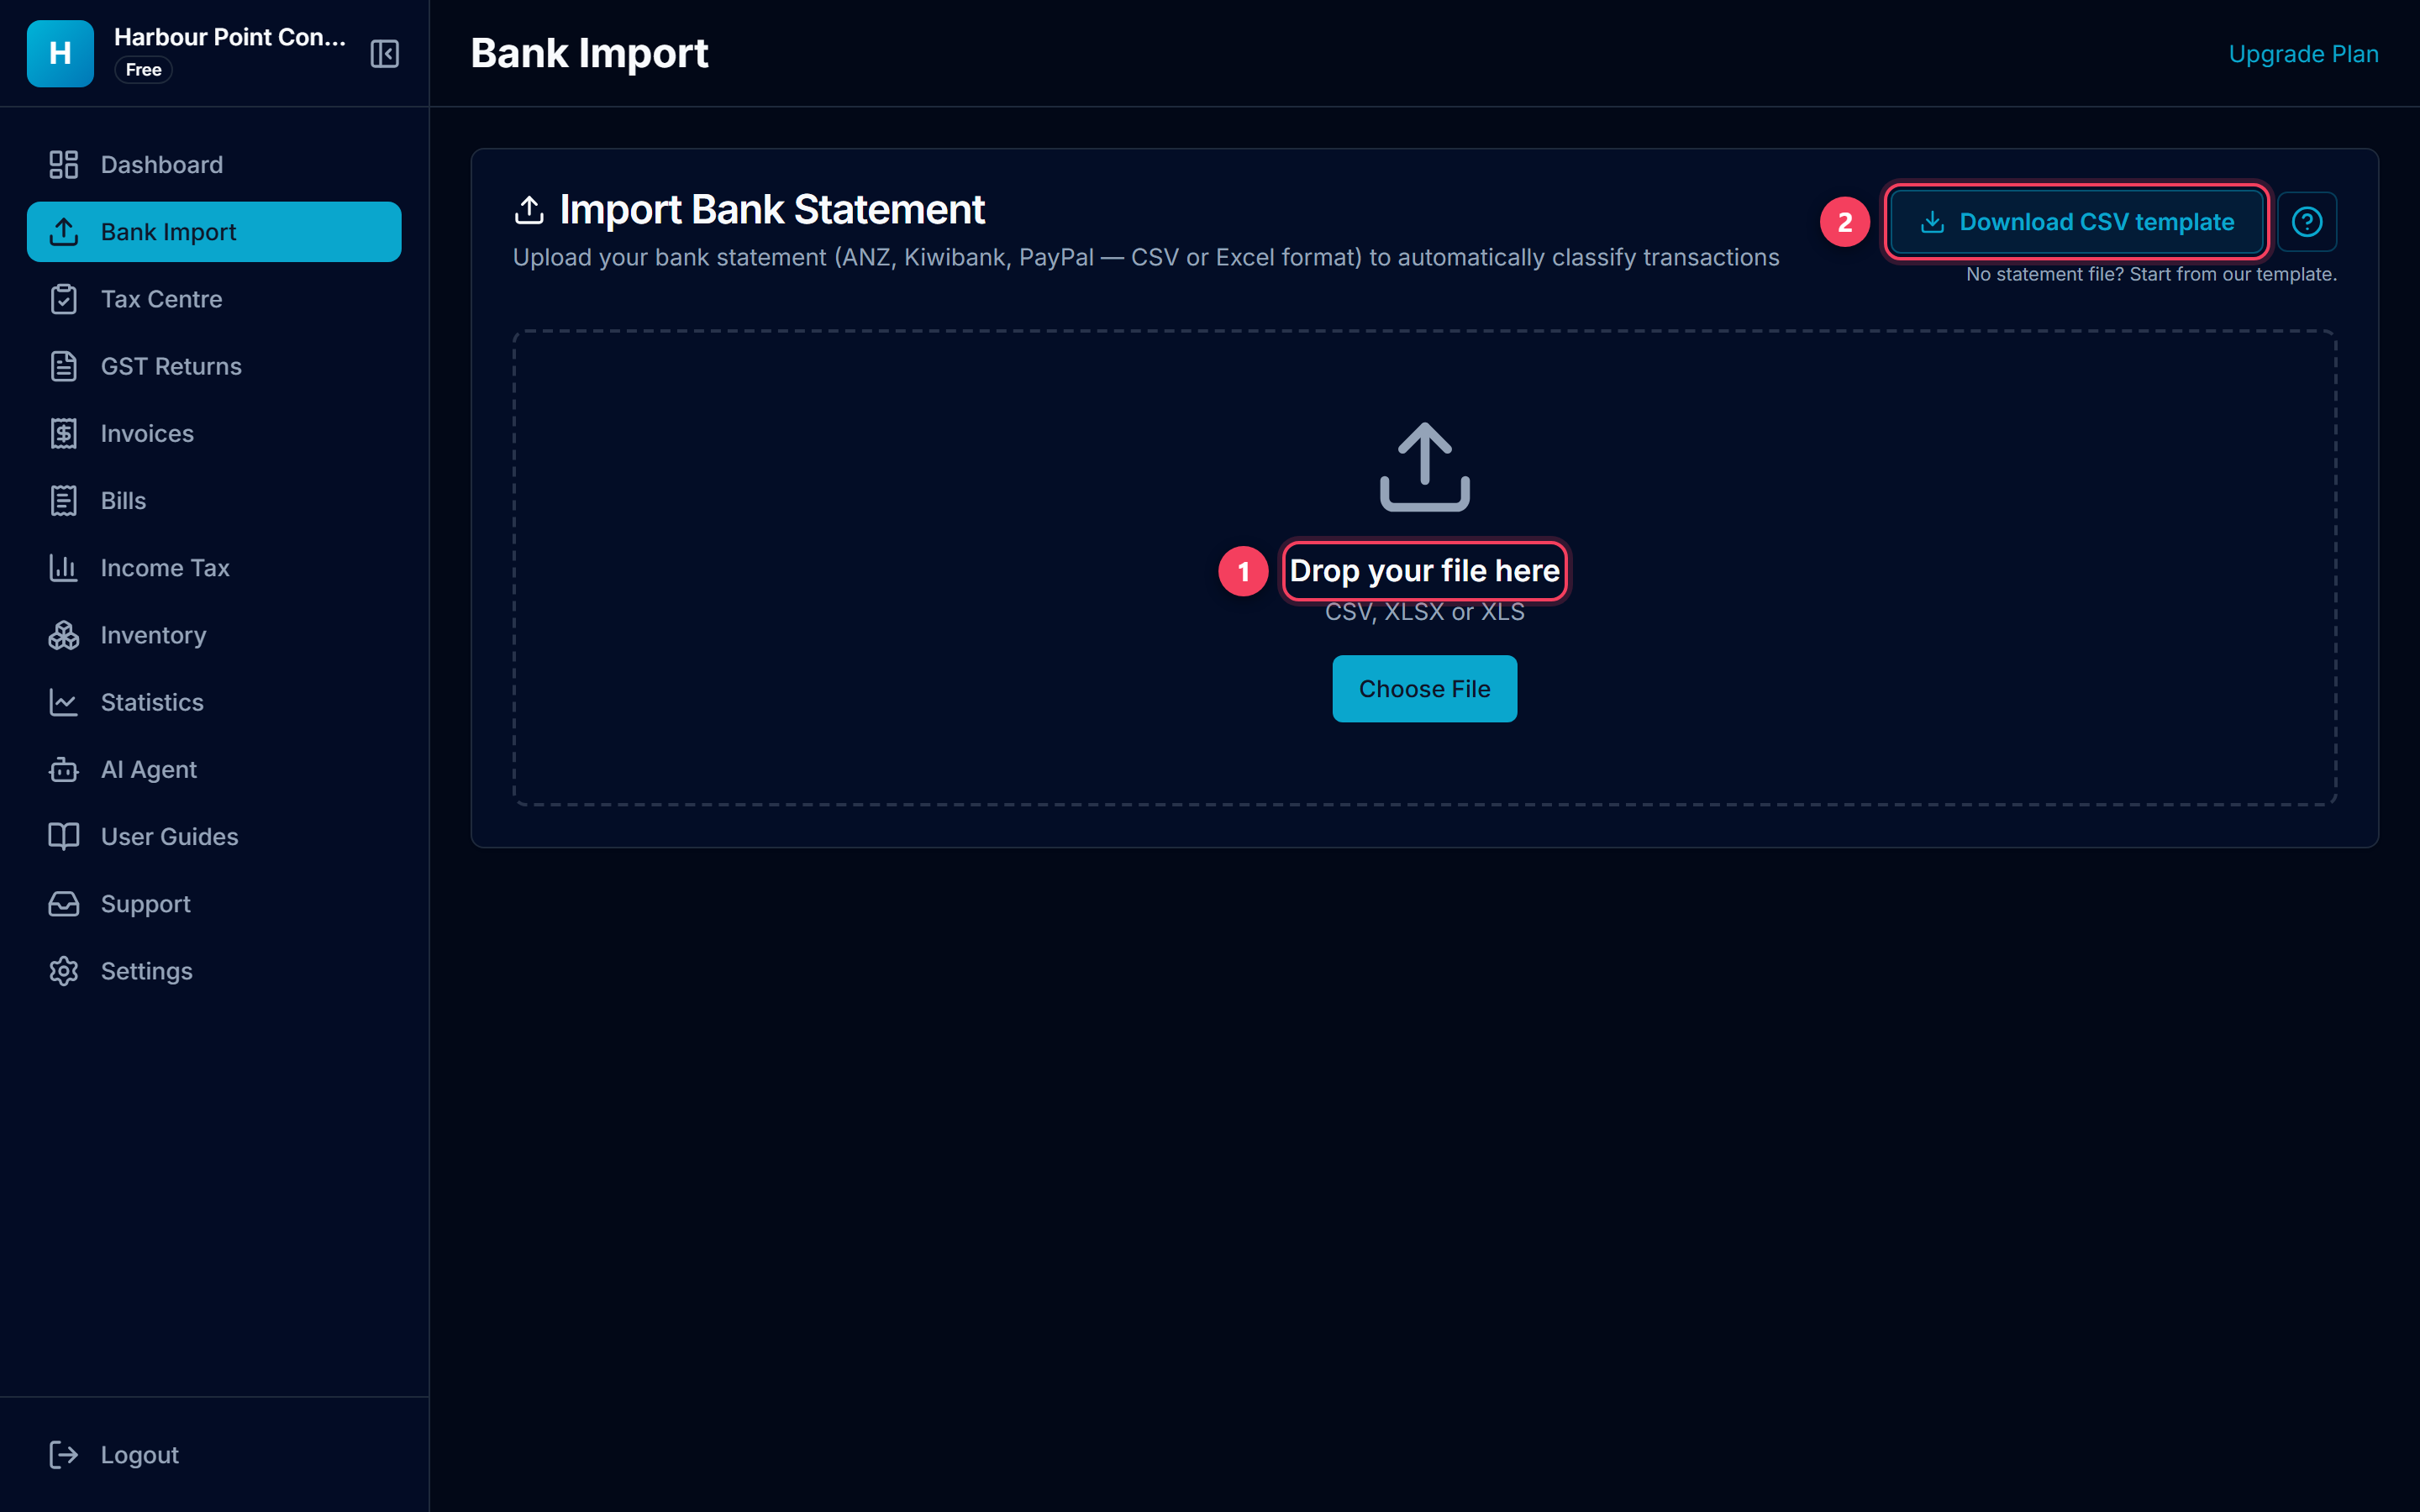
- Drop the file here, or click Choose File. CSV, XLSX and XLS are all accepted.
- No statement to hand? Download CSV template gives you the right columns to type into.
Tip: ANZ, ASB, BNZ, Westpac, Kiwibank and PayPal exports are read natively. A plain CSV with Date, Amount and Description columns also works.
3. Check what came in
The import summary tells you which format it detected and how many rows survived. Exact duplicates are skipped automatically, so re-importing an overlapping statement will not double-count anything.
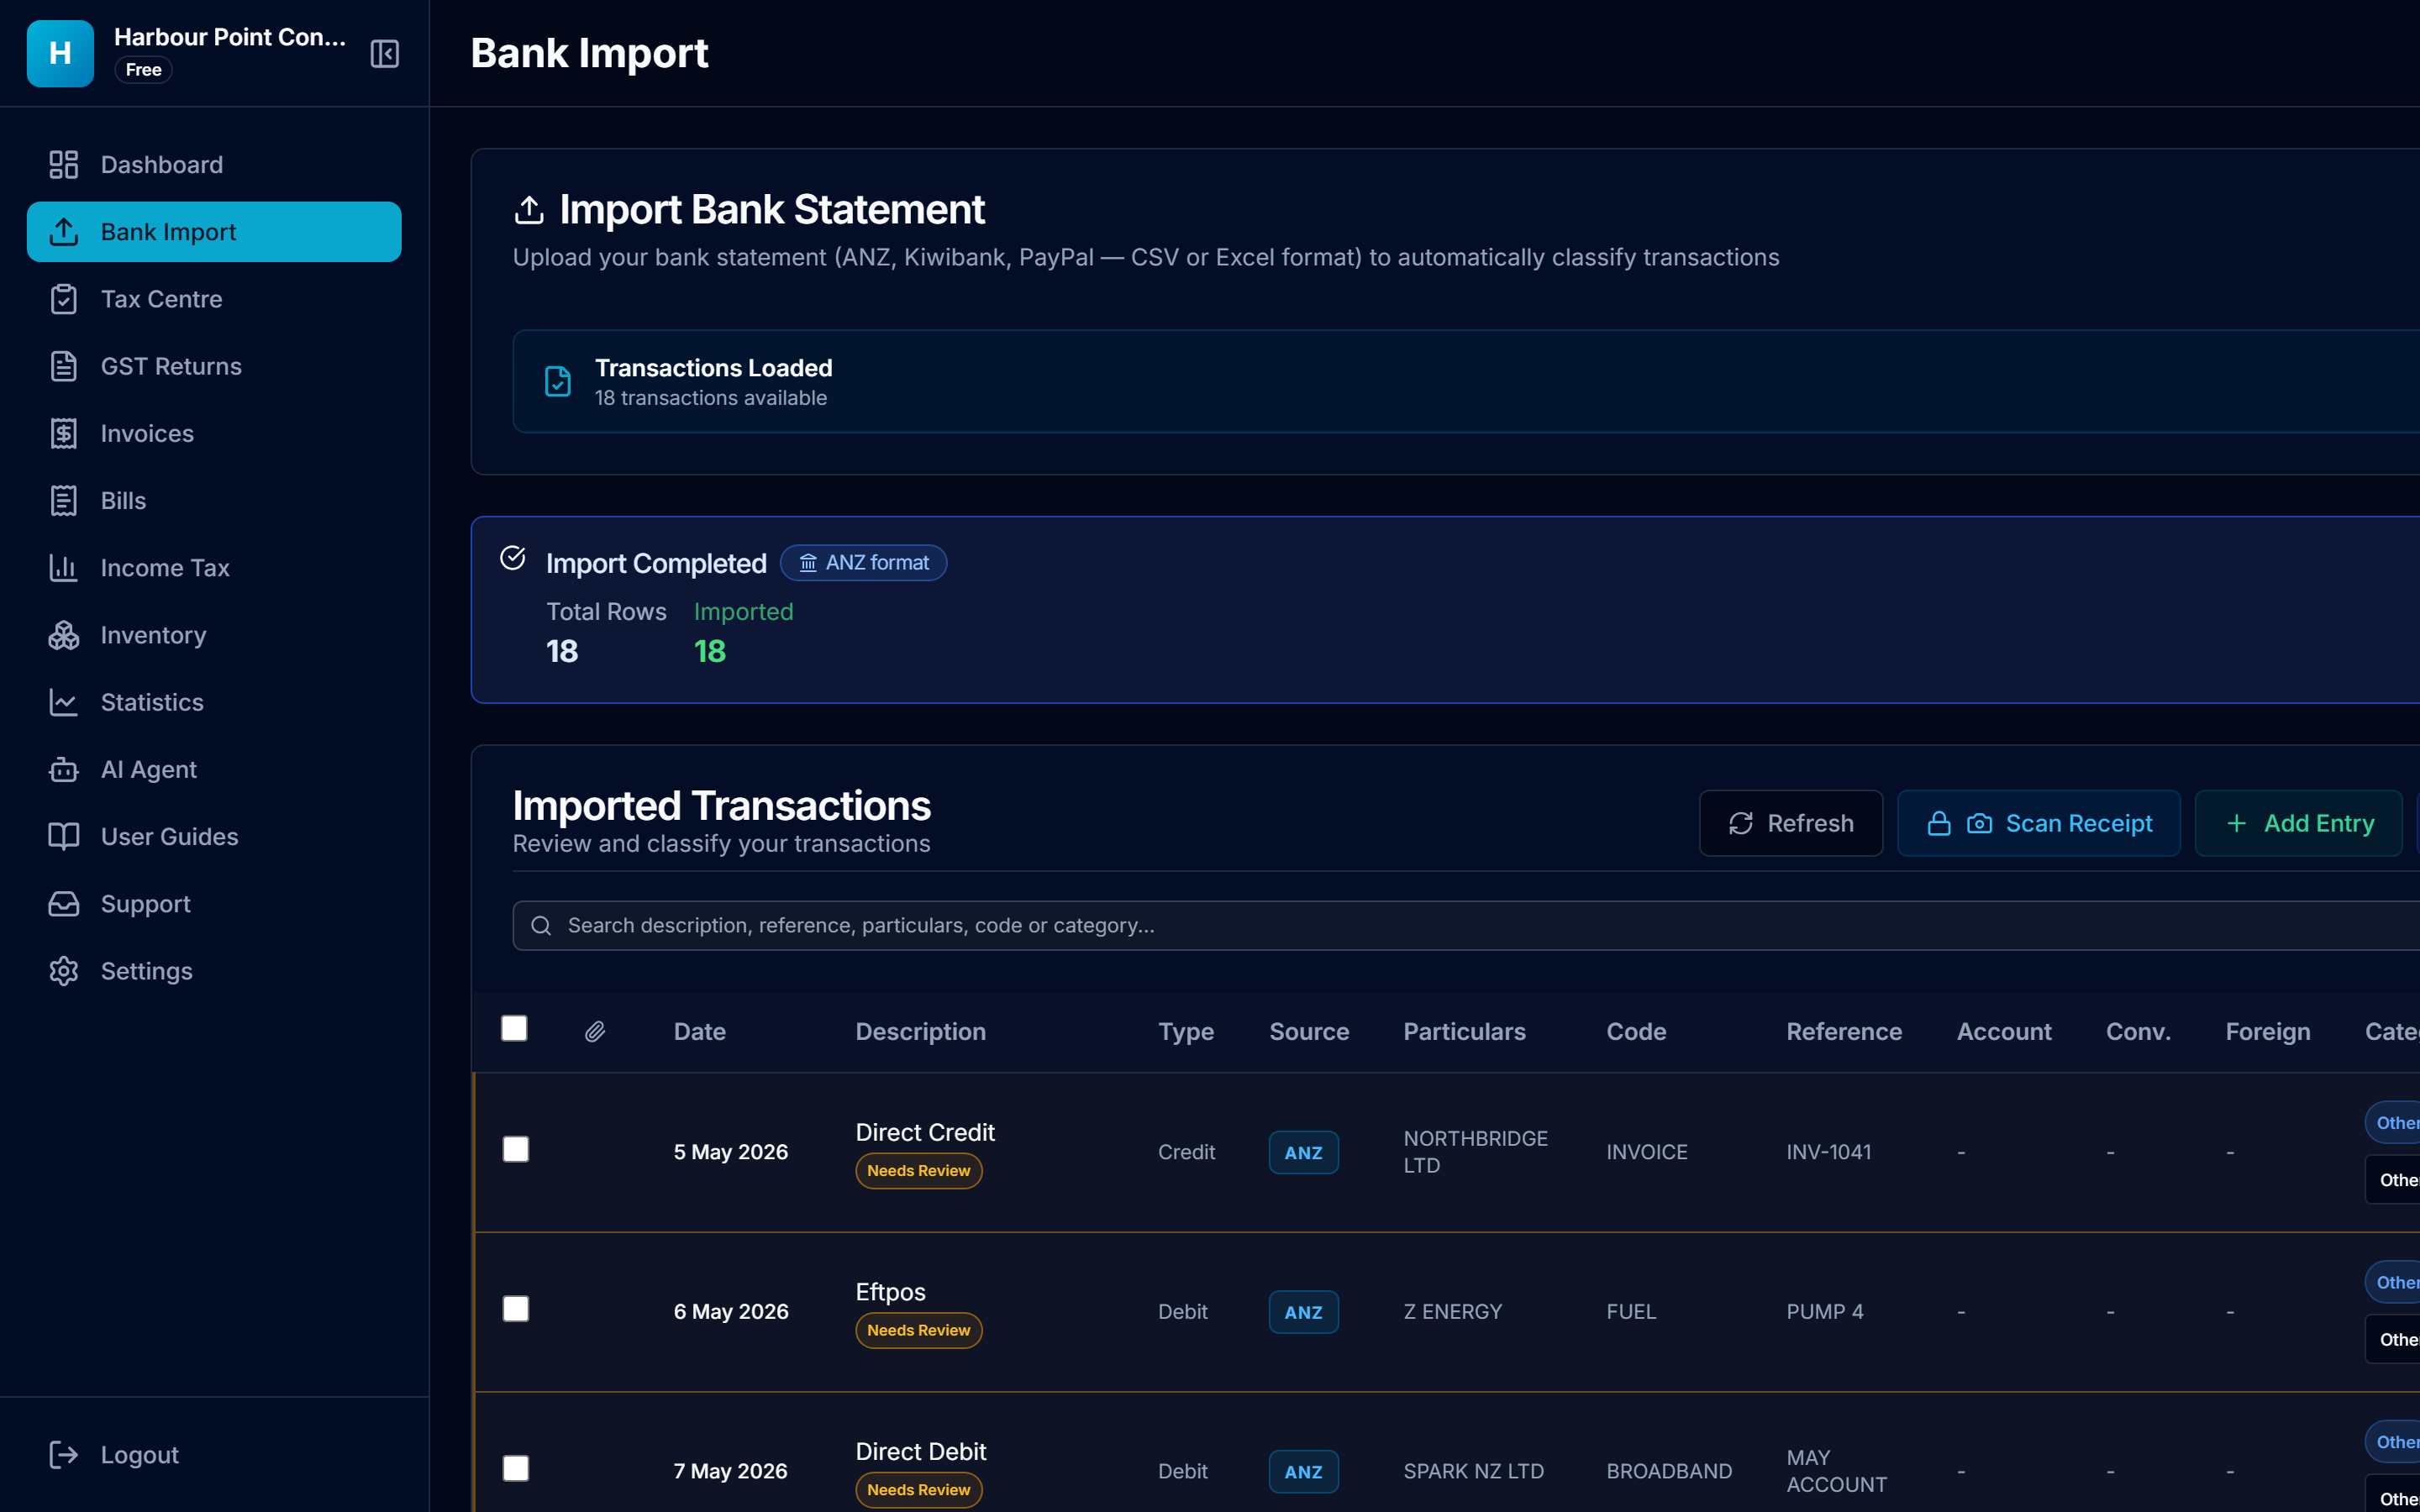
Tip: Every transaction arrives as Needs Review in the category Other. That is deliberate, and it is the single most important thing to understand about your first import.
4. Give every transaction a category
Until a transaction has a real category, it is excluded from your income, your expenses and your GST. This is why the dashboard still reads $0.00 right after an import — uncategorised money is not assumed to be business income; you have to say what it was. Click the category cell on any row to open the picker. It searches by name and by description.
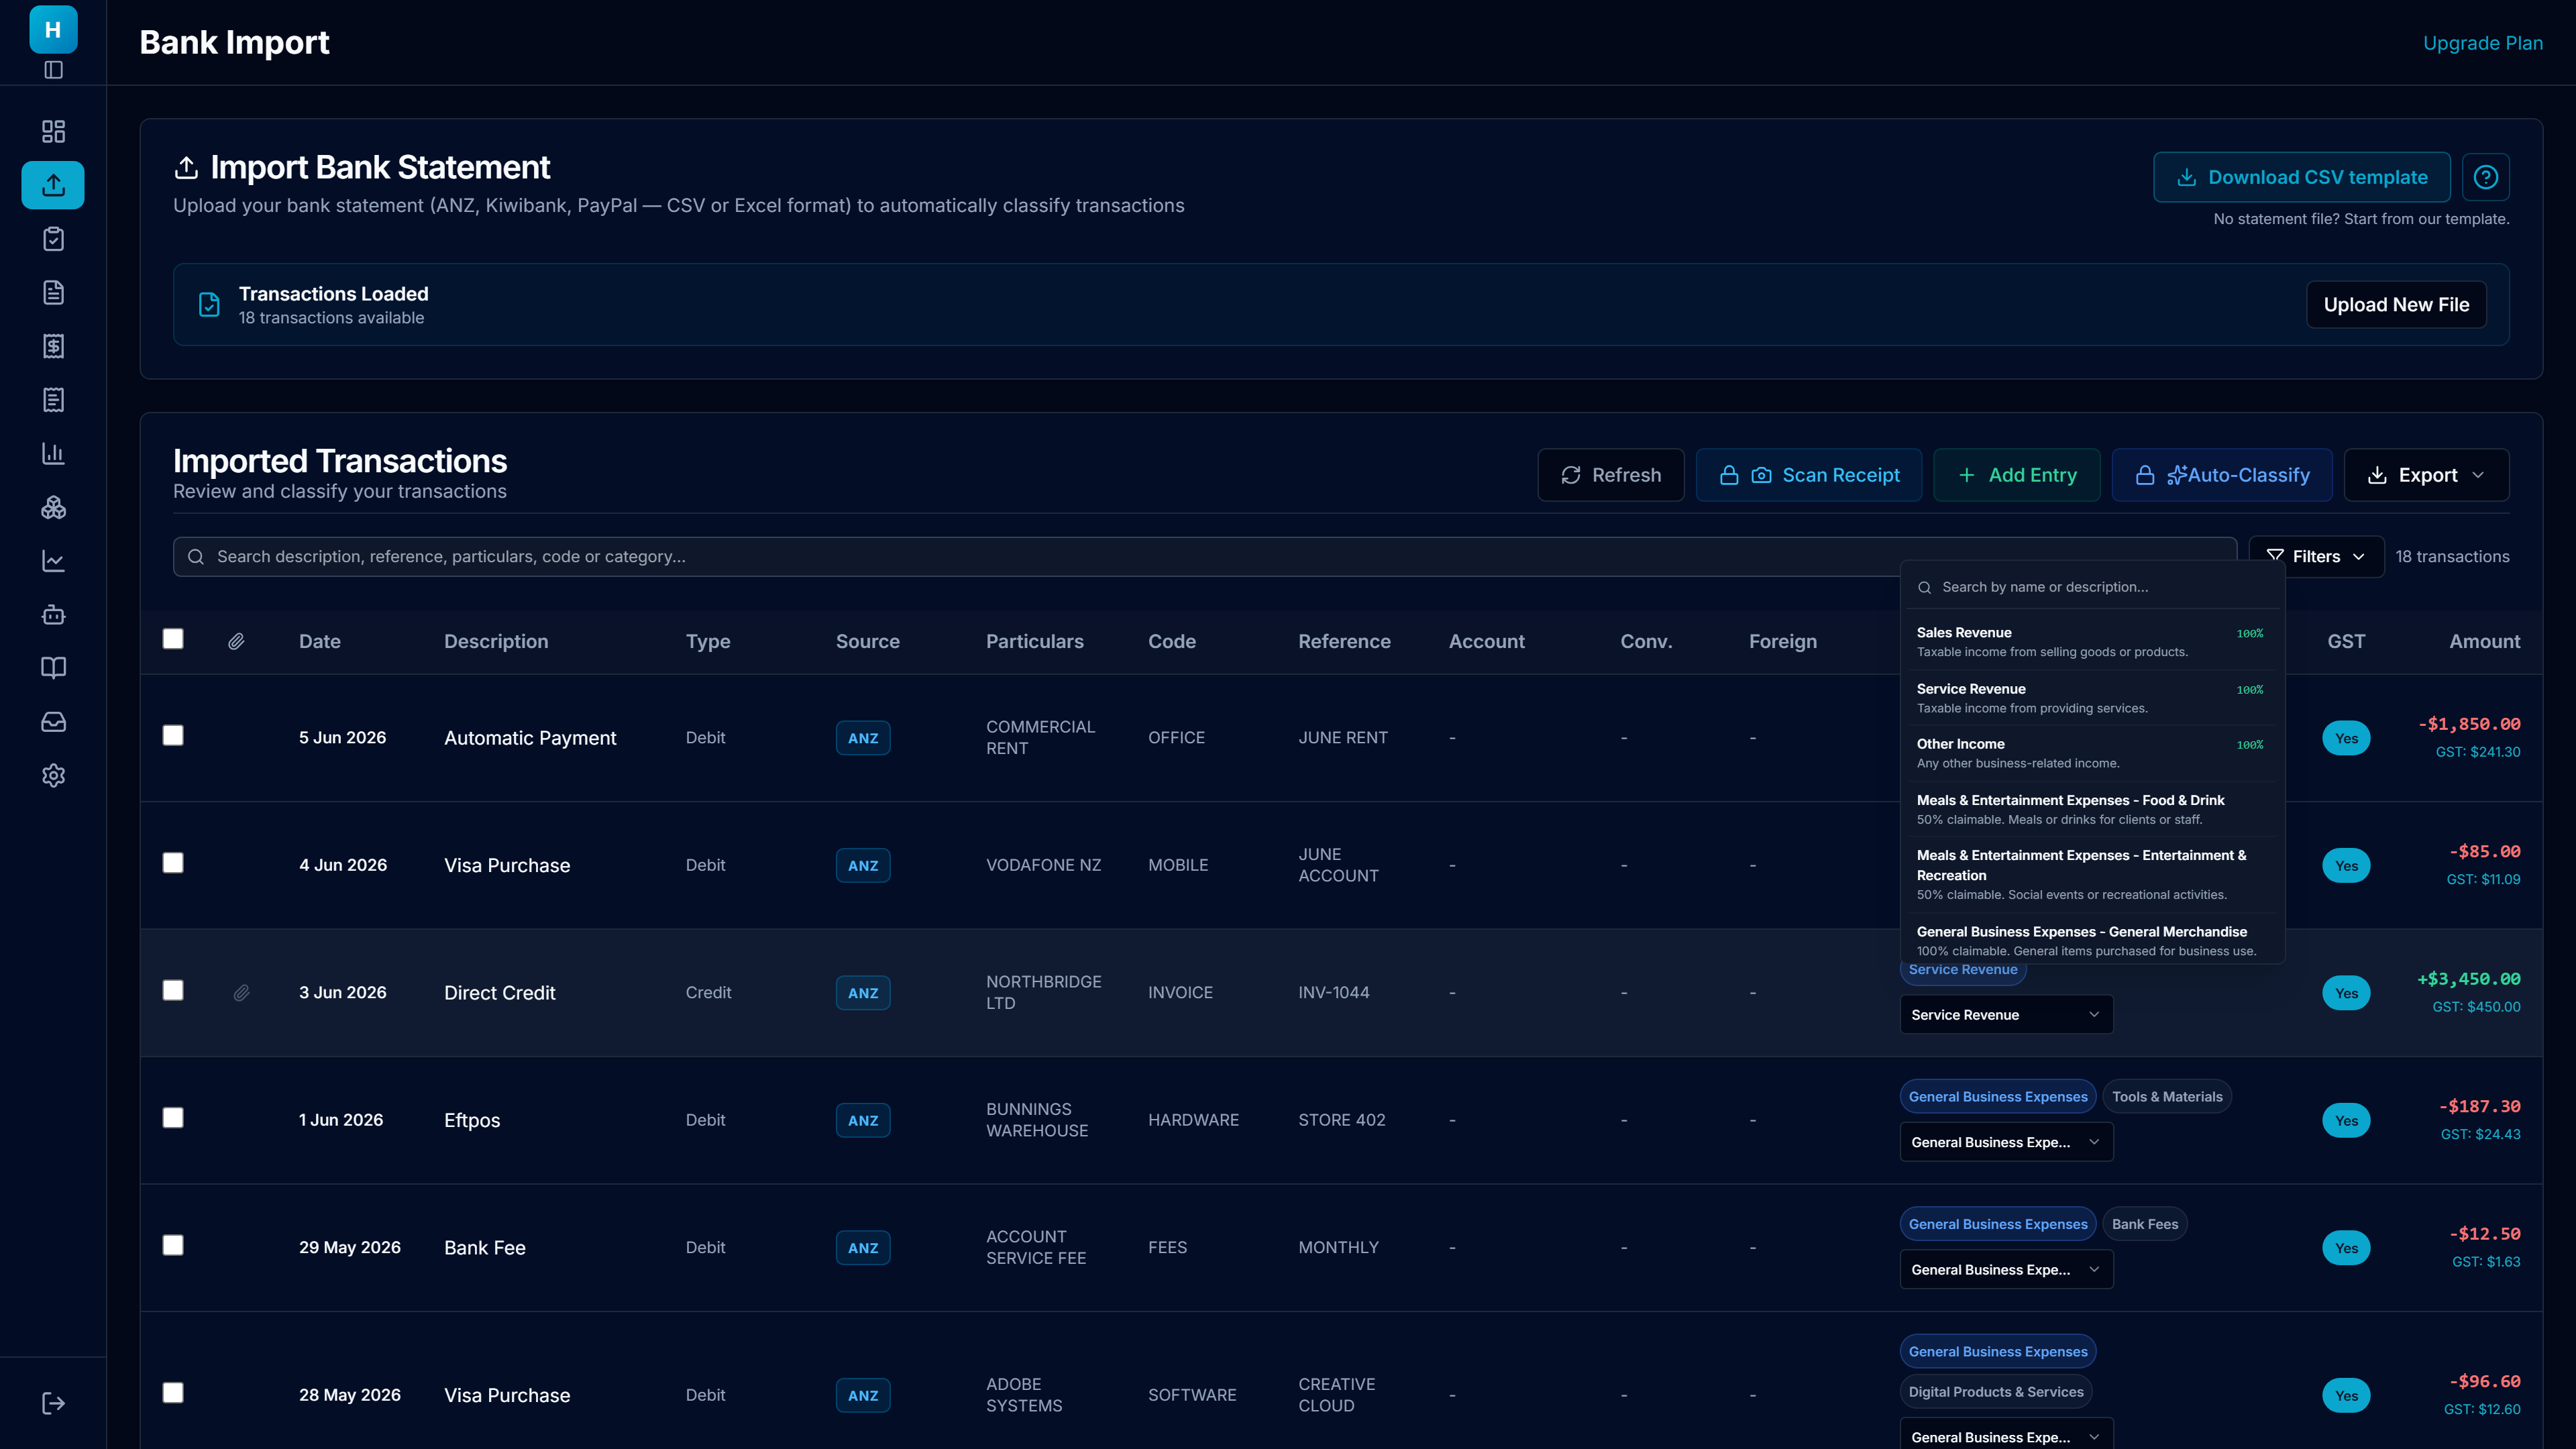
Tip: The picker carries the deductibility rule with it — 100% claimable, 50% claimable, and so on — so you are not looking rules up elsewhere.
5. What coded transactions look like
Once a row has a category, the GST column fills in and the amber "Needs Review" stripe clears. Your books are now saying something.
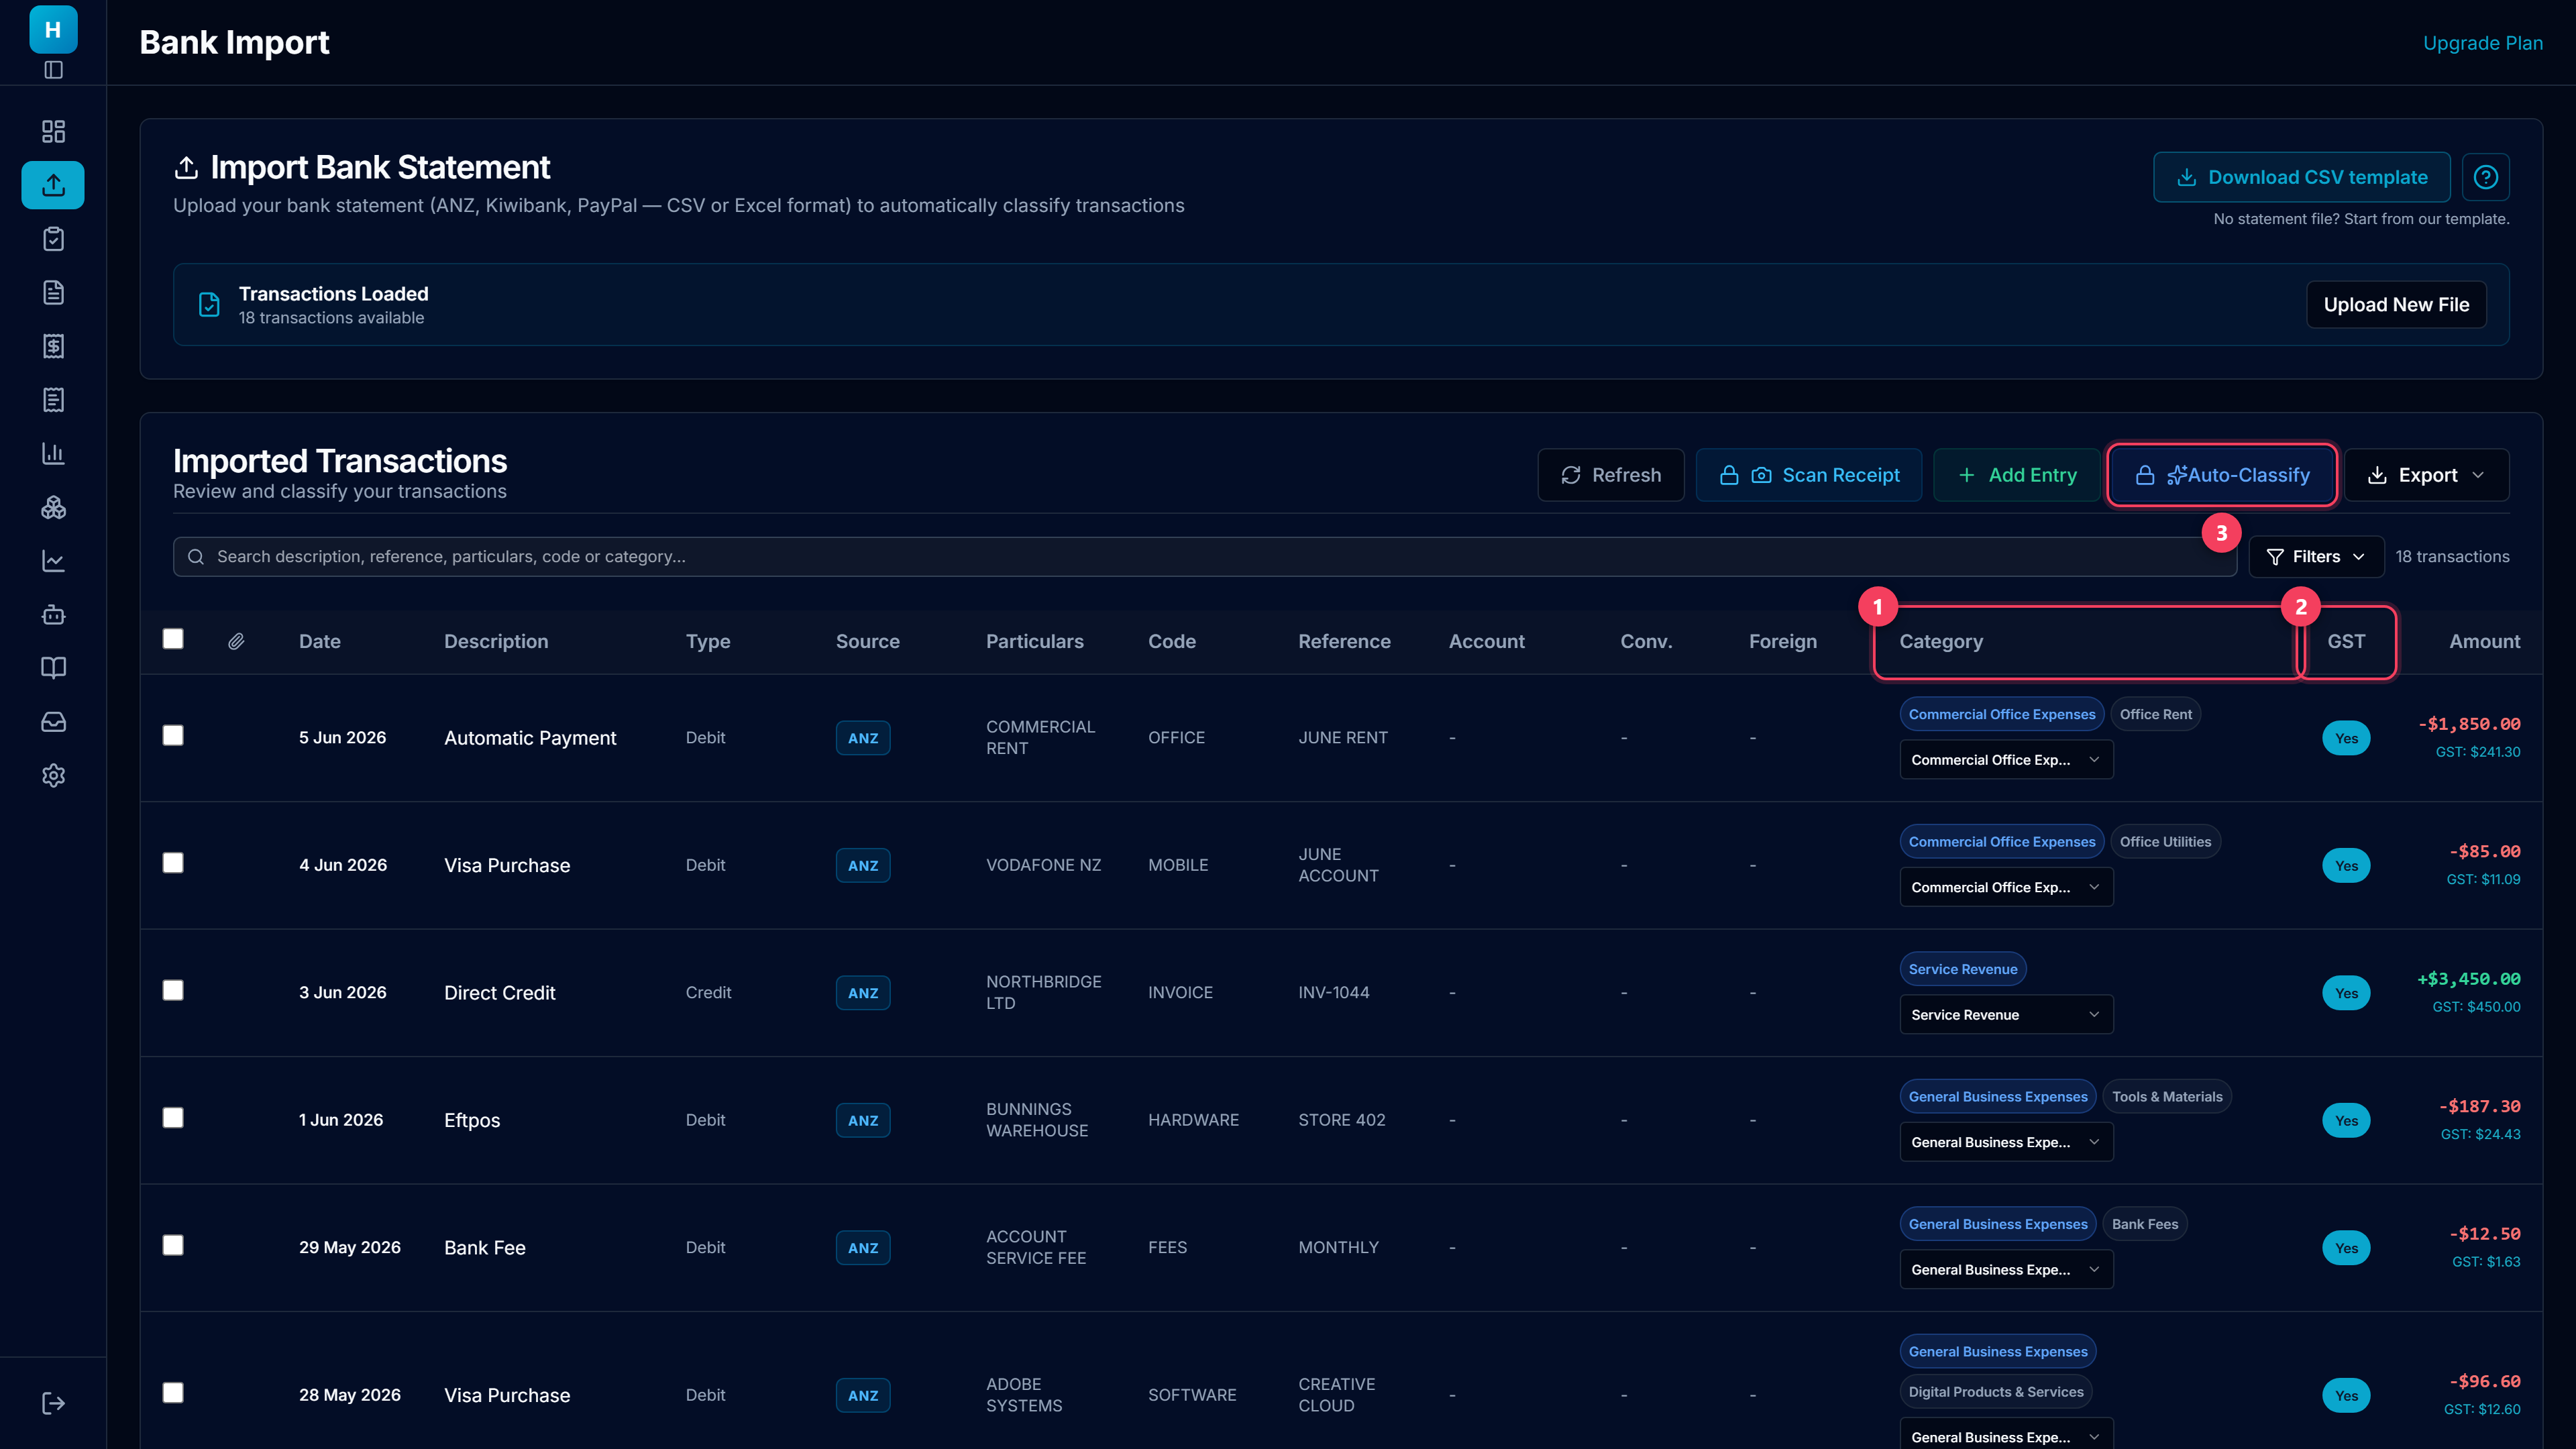
- The category, shown as a group and a specific line — "Commercial Office Expenses" then "Office Rent" — because the group drives the tax treatment.
- The GST column. Some categories carry no GST at all: bank fees, loan repayments, ACC levies. It knows which.
- Auto-Classify, locked on Free. The padlock is on the button rather than hidden, so you can see what upgrading buys.
6. Your dashboard, live
Go back to Dashboard. With the same transactions now coded, every tile has something to say — revenue, expenses, net profit and the GST you owe, all derived from the statement you imported two steps ago.
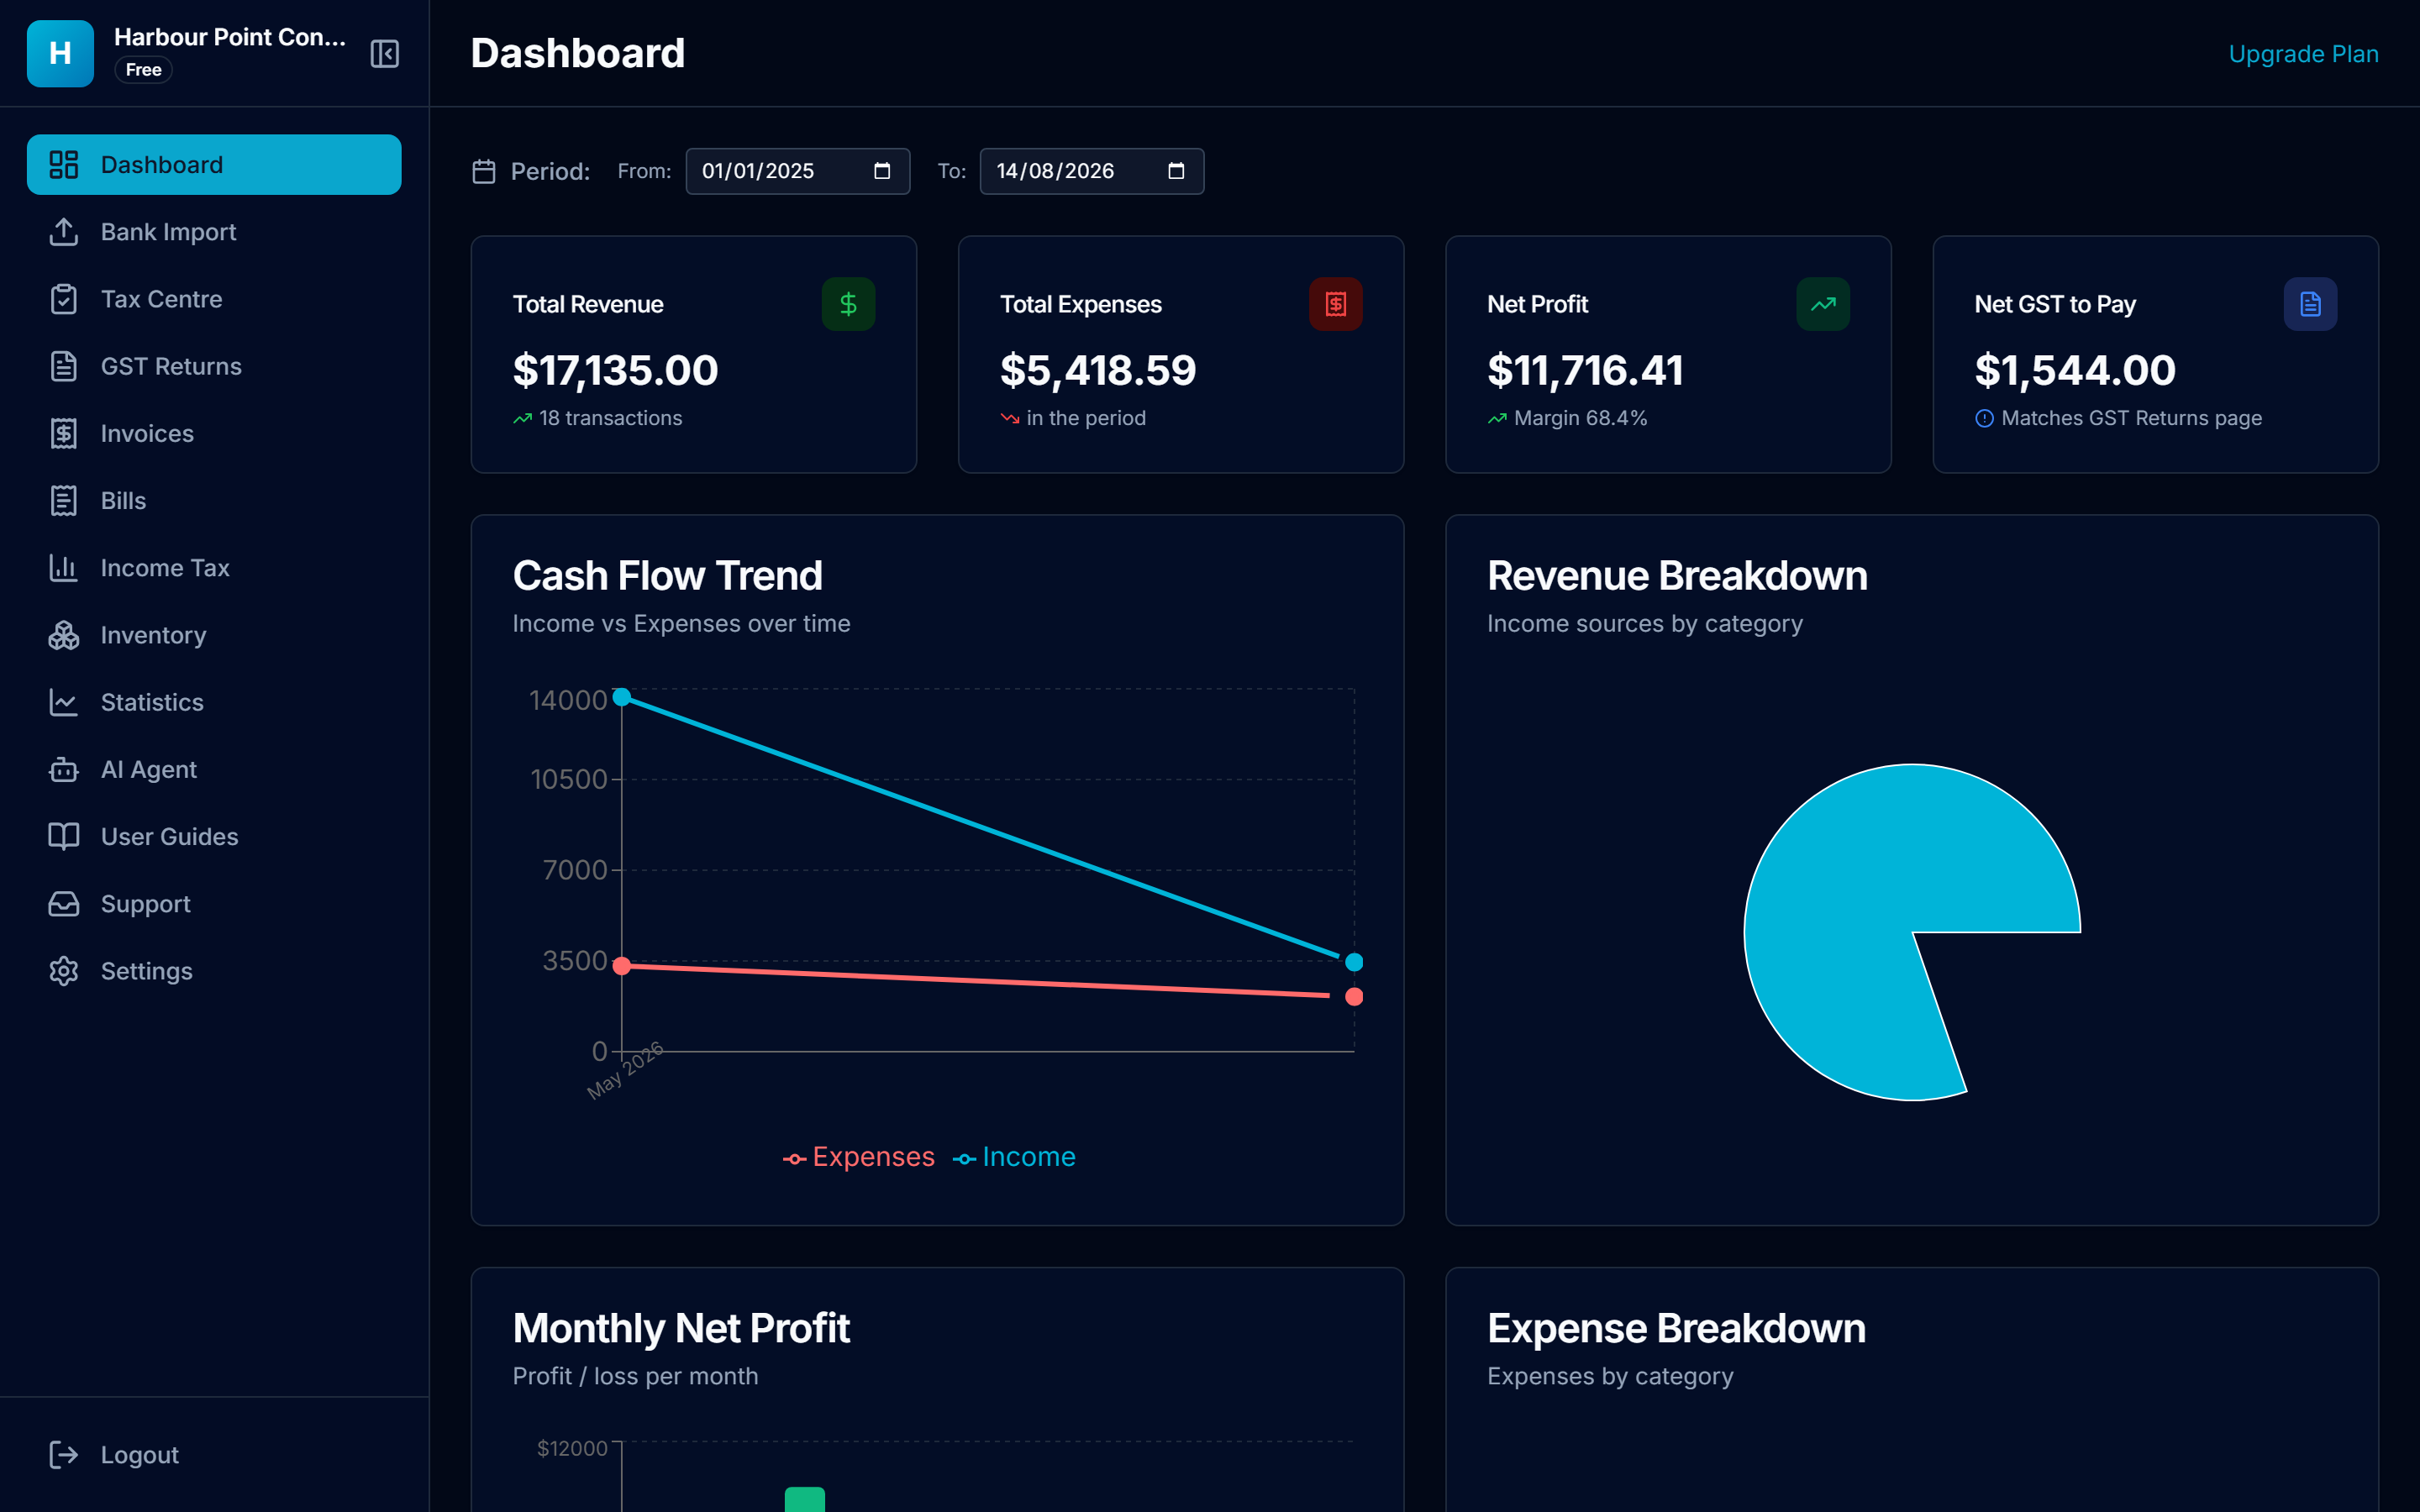
Tip: The Period selector at the top drives everything on the page. It defaults to a range that covers your data; narrow it to a month or a quarter and every tile and chart follows.
7. Your GST return, already worked out
Nothing to press. GST Returns maps your coded transactions onto the actual GST101A boxes, works out what you owe, and tells you when it is due.
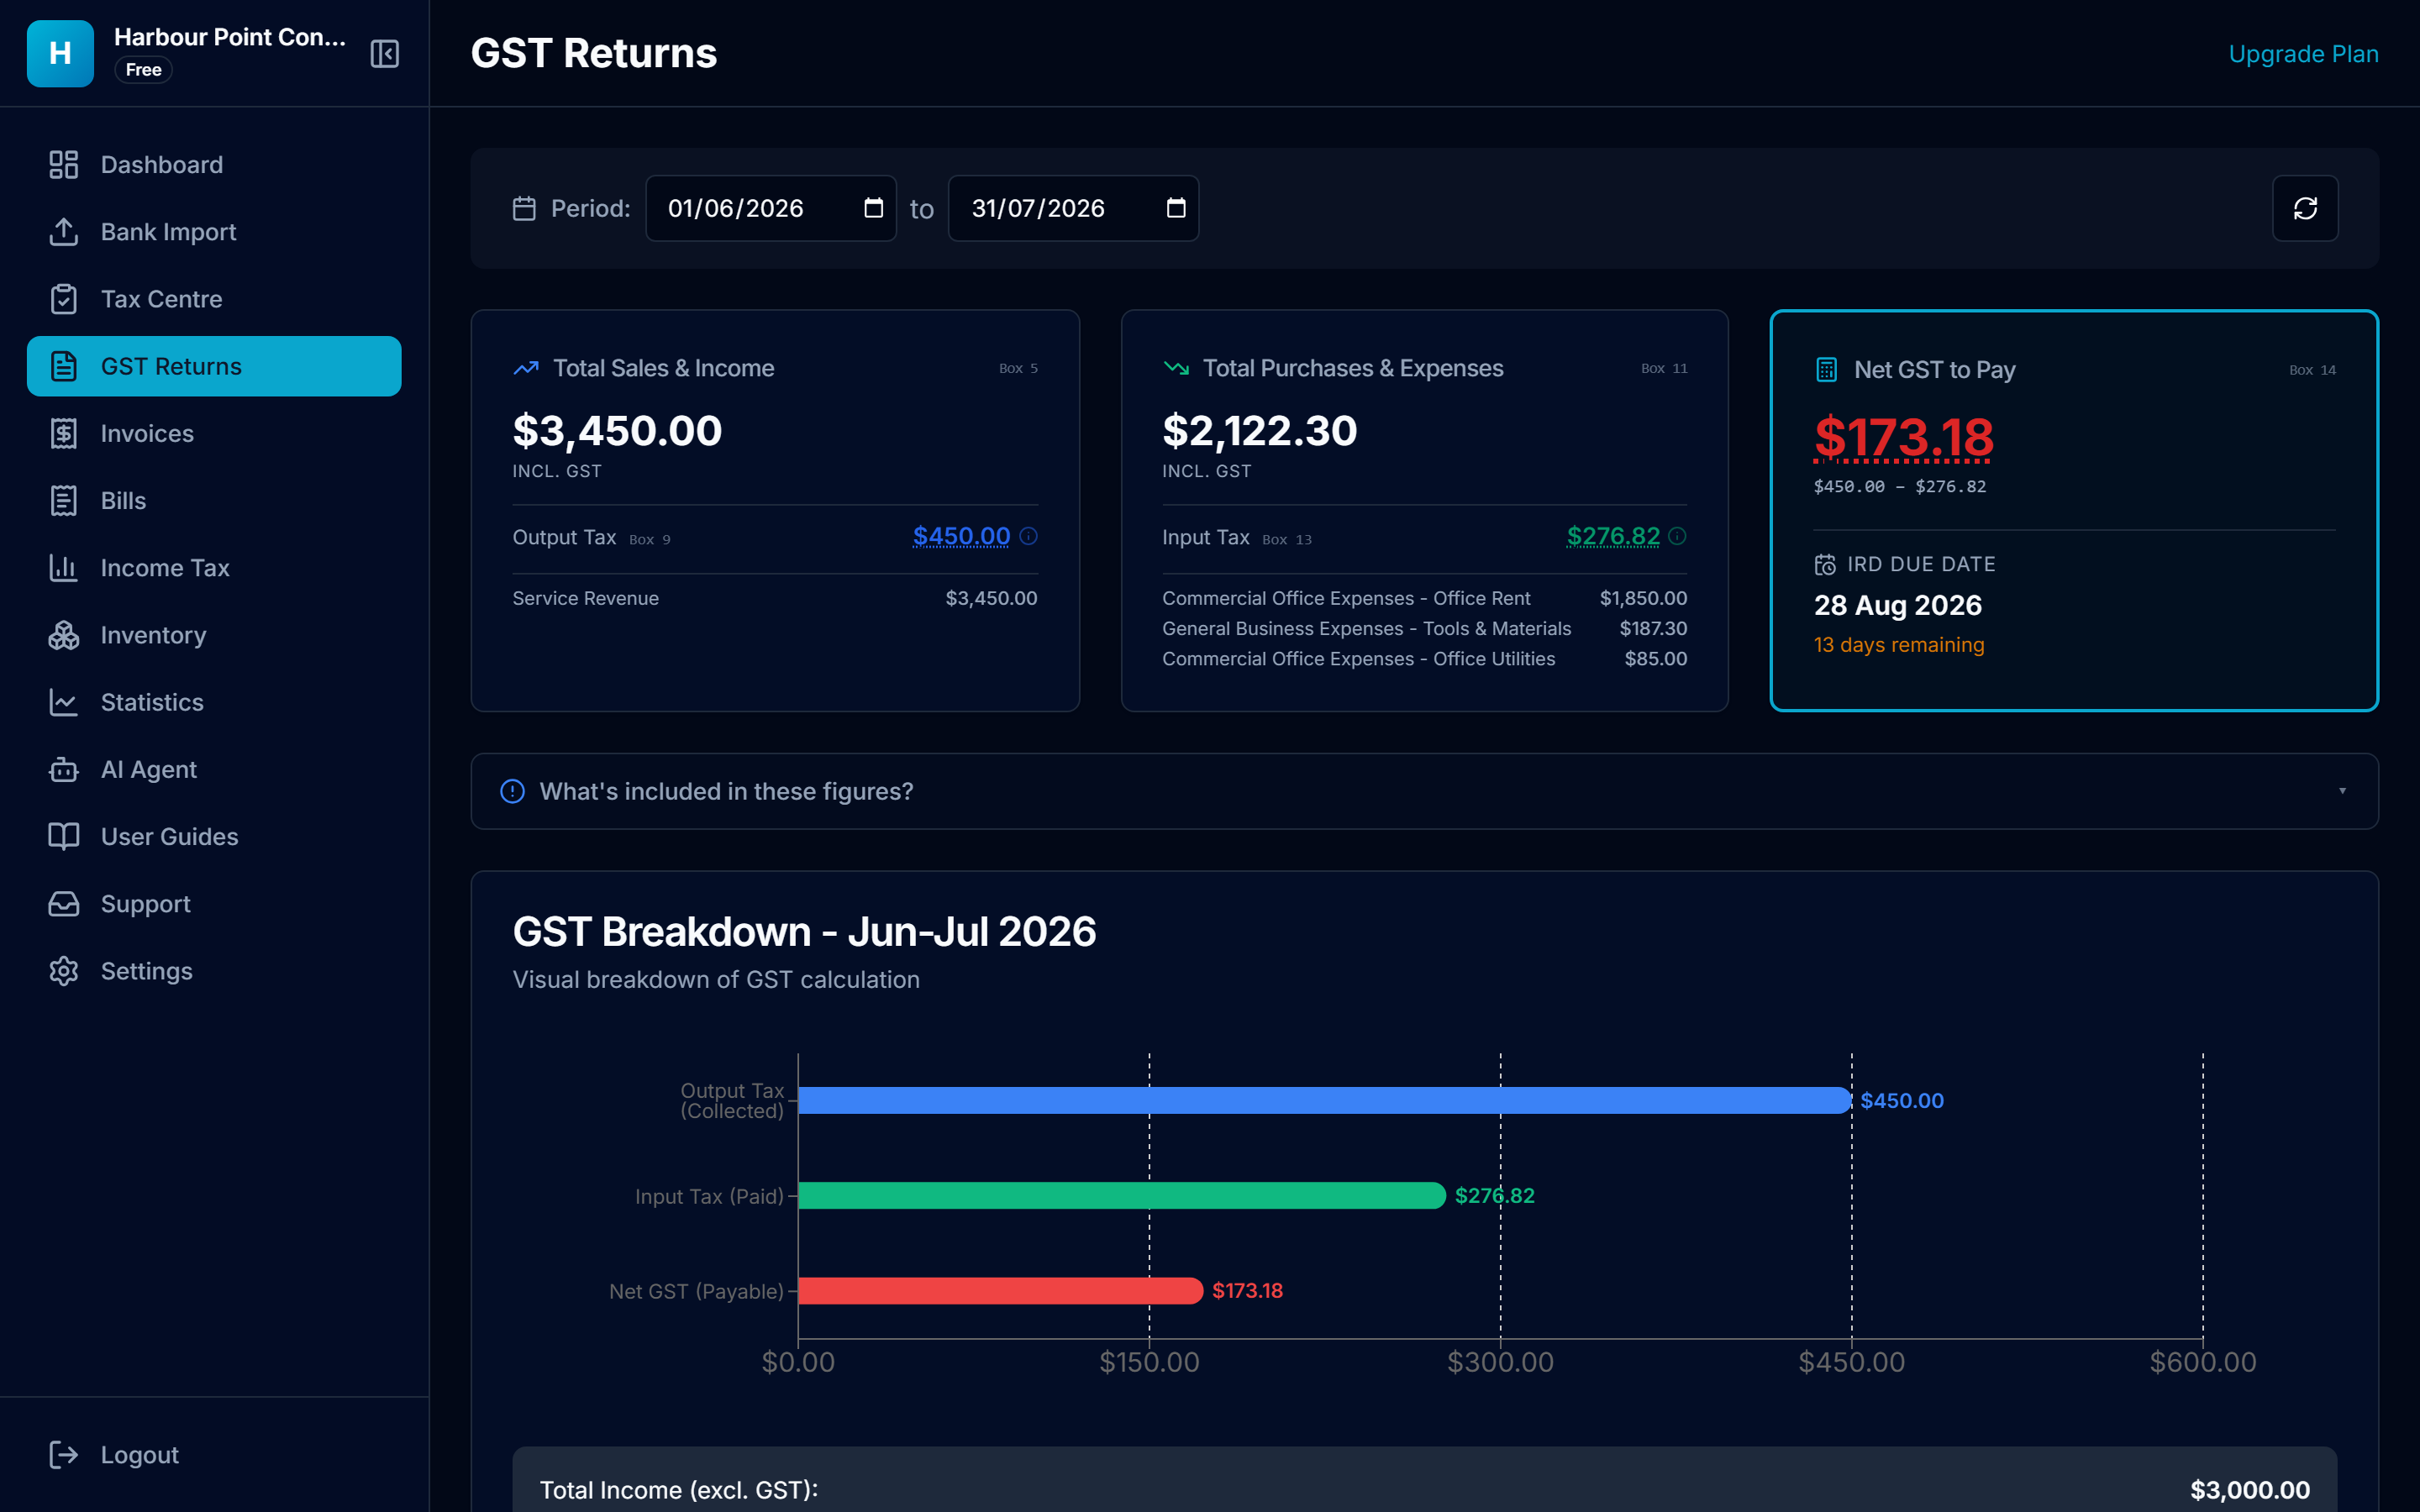
Tip: The period defaults to your filing cycle. Net GST to Pay is Box 14: output tax collected, less input tax paid. The due date counts down so a filing deadline does not arrive unannounced.
Common questions
Why does my dashboard still read $0.00 after importing?
Because imported transactions arrive as Needs Review in the category Other, and uncategorised money is excluded from income, expenses and GST. Categorise the rows and the dashboard fills in immediately.
What does the Free plan actually include?
Everything in this guide works on the Free plan — you can complete a full GST period without hitting a wall. What the paid tiers buy is automation (like AI auto-classification), not access.
I haven't created an account yet — where do I start?
See the companion guide “Creating your LedgerMind account” — one email field and a six-digit code, about ninety seconds end to end. There is also a two-minute demo video at the top of ledgermind.co.nz.